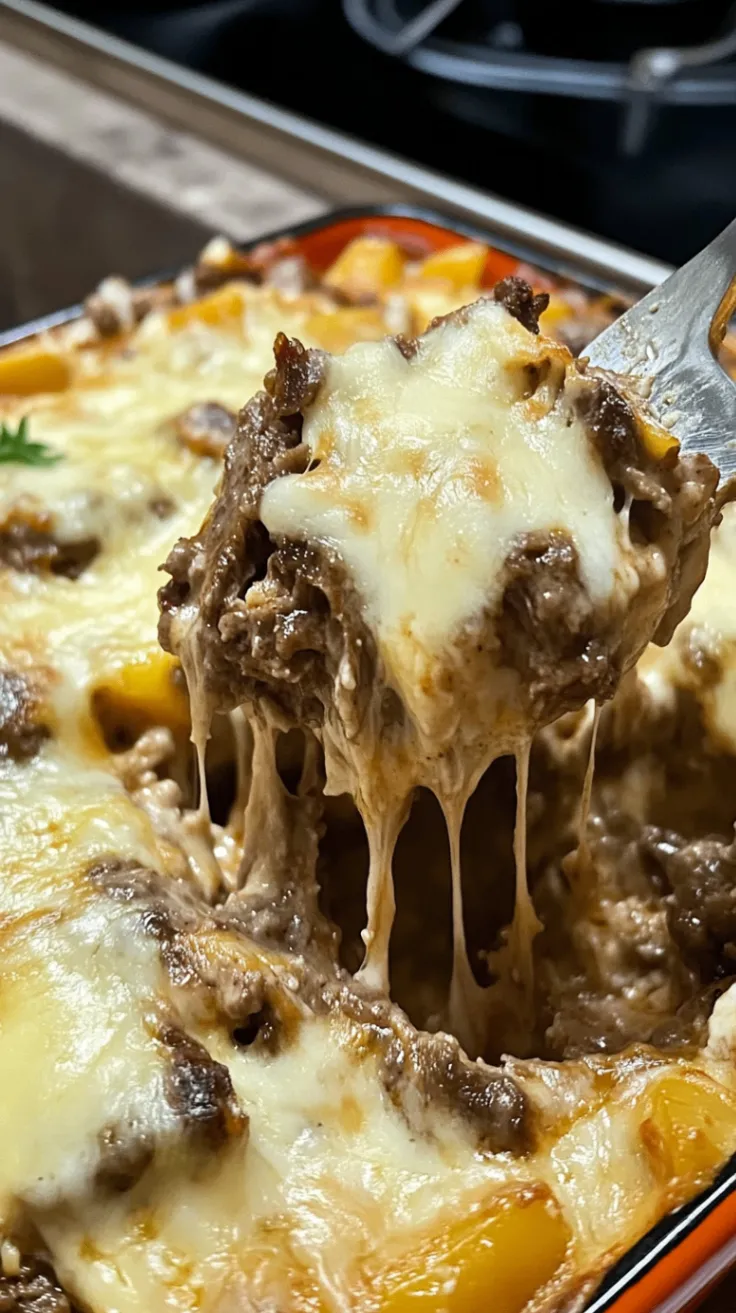
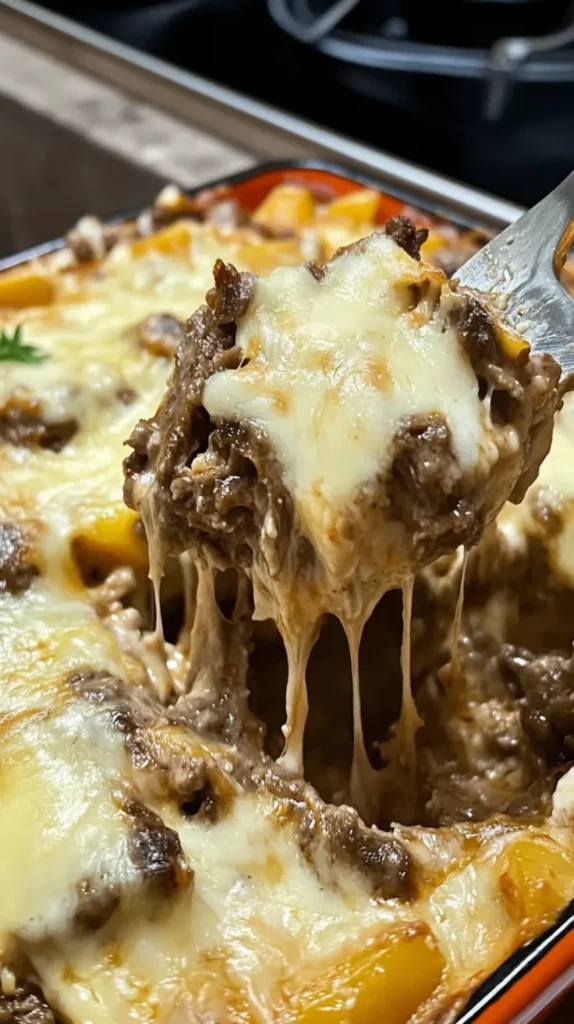
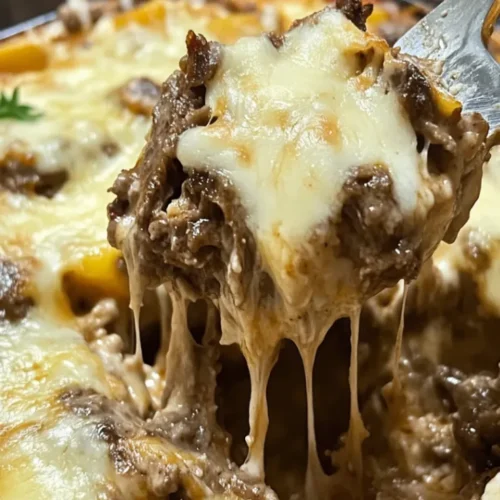
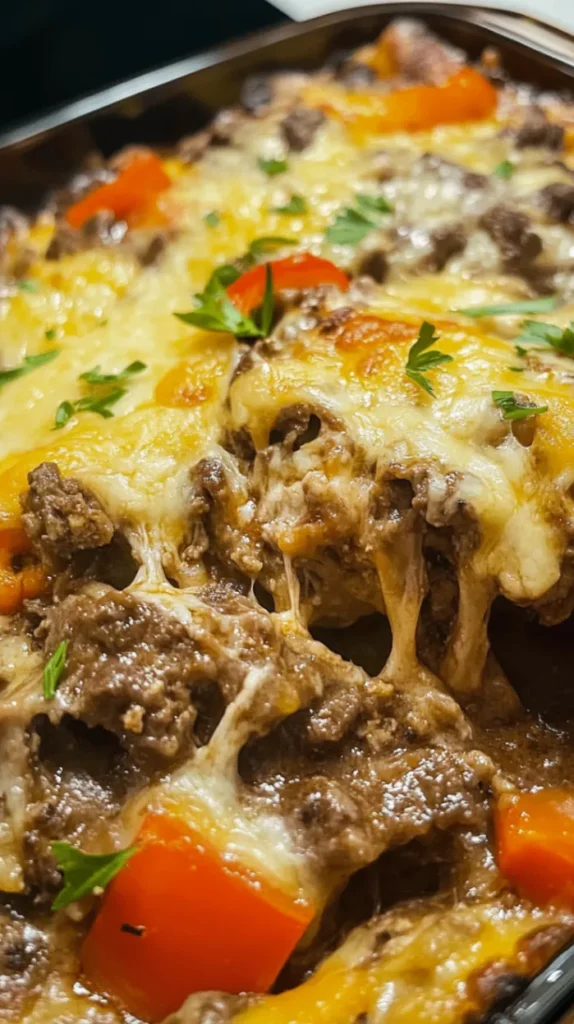
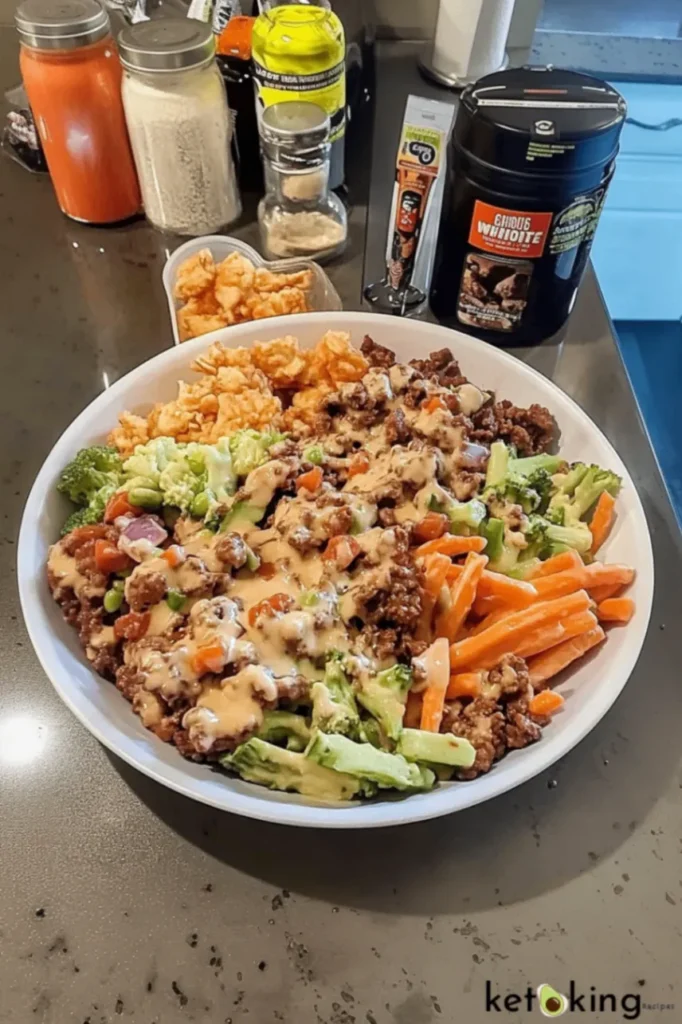
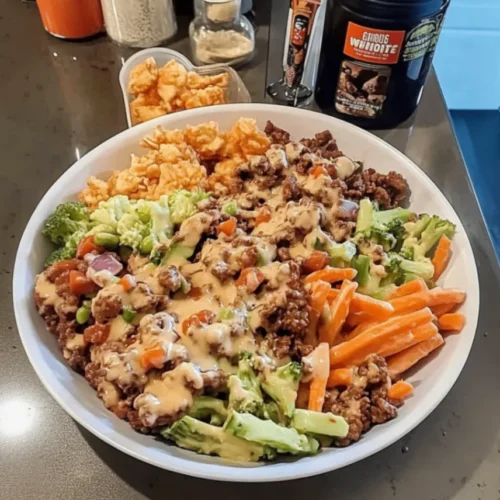
Your Keto Plan is Ready! Click Here →

Advertisements

Pizza Waffles

The Joy of Pizza Waffles

There’s something magical about foods that blend comfort with creativity. When you think about pizza, your mind probably races to cheesy slices, bubbling tomato sauce, and golden crusts. And waffles? Well, they’re the epitome of cozy weekend mornings.

Now imagine this: the cheesy, herby goodness of pizza meets the crispy, golden delight of waffles. That’s the joy of Pizza Waffles — a game-changing dish that gives you the best of both worlds without sacrificing your health goals.

Maybe you’re someone who’s gone low-carb or embraced the keto lifestyle. Maybe you just want a quick snack that doesn’t involve ordering in. Either way, pizza waffles offer a unique solution. They deliver the flavors you crave with the convenience you need. Whether it’s for breakfast, lunch, or a midnight bite, these savory waffles might just become your new obsession.

Why You’ll Love Pizza Waffles

Quick and Easy to Prepare

Let’s be honest: cooking can sometimes feel like a chore. But with pizza waffles, it doesn’t have to. You only need a few simple ingredients and about 15 minutes of your time. With minimal prep and mess, these waffles are perfect for busy weekdays, lazy weekends, or late-night snack runs.

Keto-Friendly and Low-Carb

One of the biggest perks of pizza waffles is their low-carb nature. Made without flour and loaded with cheese and protein, they fit snugly into your keto meal plan. You can even adjust the ingredients to reduce the carb count further, using your favorite keto swaps and alternatives.

Versatile and Family-Friendly

Whether you’re cooking for picky kids, fitness-focused adults, or anyone in between, pizza waffles are a crowd-pleaser. You can personalize each waffle with different toppings to suit everyone’s taste. They’re also portable, making them great for school lunches or work snacks.

Pizza Waffles Ingredients and Substitutions

Basic Ingredients

Pizza Waffles

Crispy, cheesy, and packed with flavor, these low-carb Pizza Waffles combine the best of two comfort foods — perfect for keto lovers or anyone craving a quick savory snack. Ready in under 15 minutes, and completely customizable!
Prep Time 5 minutes
Cook Time 10 minutes
Total Time 15 minutes
Course lunch
Cuisine American, Keto, Low-Carb
Calories 180 kcal

Equipment

  • Mixing bowl
  • Mini waffle maker
  • Baking sheet
  • Oven or broiler
  • Spoon or spatula

Ingredients
  

  • Ingredients:
  • 1 egg
  • 1/3 cup shredded mozzarella
  • 1/4 tsp garlic powder
  • 1/4 tsp onion powder
  • 1/2 tsp Italian seasoning
  • 2 tbsp low-carb/sugar-free pizza sauce
  • Additional shredded mozzarella for topping
  • Oregano and crushed red pepper flakes to taste
  • Pepperoni slices optional
  • Optional Add-ins:
  • Chopped bell peppers
  • Sliced olives
  • Fresh basil or spinach
  • Jalapeños
  • Mushrooms

Instructions
 

  • Instructions:
  • In a bowl, whisk the egg and mix in mozzarella, garlic powder, onion powder, and Italian seasoning.
  • Preheat the waffle maker and lightly grease it.
  • Pour half of the mixture into the waffle maker and cook for 3–5 minutes until golden and crispy.
  • Place cooked waffles on a baking sheet, spread pizza sauce, add more mozzarella, and your choice of toppings.
  • Bake at 375°F or broil until the cheese melts and bubbles.
  • Serve hot with optional dips and garnish with oregano and crushed red pepper.

Notes

Notes:
Use a mini waffle maker for best texture and portion control.
For dairy-free, substitute with vegan cheese.
Leftovers keep well in the fridge for up to 3 days. Reheat in an air fryer for crispiness.
Freeze cooked waffles for up to 2 months. Reheat before serving.
Keyword Keto Pizza Waffles, Pizza Waffles

Optional Add-Ins

  • Diced bell peppers for crunch
  • Black olives for salty contrast
  • Sliced mushrooms for umami
  • Fresh basil or spinach for greenery
  • Jalapeños for heat
  • Vegan cheese for dairy-free option

You can substitute mozzarella with cheddar or a blend if you want a more intense cheese flavor. Don’t have Italian seasoning? Combine oregano, basil, thyme, and rosemary.

How to Make Pizza Waffles (Step-by-Step Instructions)

Step-by-Step Method

  1. Prepare the Waffle Mixture
    • In a bowl, whisk the egg.
    • Stir in shredded mozzarella, garlic powder, onion powder, and Italian seasoning.
  2. Preheat Your Waffle Maker
    • Lightly grease the waffle plates to avoid sticking.
  3. Cook the Waffles
    • Pour half of the mixture into the waffle maker.
    • Close the lid and cook for 3–5 minutes or until golden and crispy.
  4. Top and Toast
    • Transfer cooked waffles to a baking sheet.
    • Spread pizza sauce on each one and sprinkle with more mozzarella.
    • Add your favorite toppings (like pepperoni or veggies).
  5. Melt the Toppings
    • Place under a broiler or bake in a 375°F oven until the cheese is melted and bubbly.
  6. Serve and Enjoy
    • Sprinkle with oregano and red pepper flakes.
    • Serve hot with dipping sauce if desired.

Pro Tips for Success

  • Use a mini waffle maker for perfect personal portions.
  • Avoid overfilling the waffle iron to prevent overflow.
  • Use pre-shredded cheese sparingly, or shred your own for better melt and fewer additives.
  • Leftovers? Store in an airtight container for up to 3 days and reheat in an air fryer.

Pizza Waffle Variations You’ll Want to Try

Creative Keto Pizza Waffle Ideas

  • Meat Lovers Pizza Waffles: Add bacon bits, crumbled sausage, and pepperoni.
  • Veggie Supreme: Use diced bell peppers, onions, mushrooms, and olives.
  • BBQ Chicken Style: Swap pizza sauce with low-carb BBQ sauce, add shredded chicken and red onions.
  • Spicy Jalapeño Popper Waffles: Mix in cream cheese and jalapeños for a spicy kick.

Customization Ideas

  • Make it breakfast-style by adding scrambled eggs and breakfast sausage.
  • Want it sweet and savory? Add a pinch of cinnamon and sugar-free maple syrup.

Nutritional Breakdown (Per Waffle)

NutrientAmount
Calories~180
Protein10g
Carbohydrates3–4g net
Fat13g

(Values may vary based on toppings and brands used.)

Frequently Asked Questions (FAQ About Pizza Waffles)

Are Pizza Waffles Keto-Friendly?

Yes, pizza waffles are completely keto-friendly when made with low-carb ingredients like cheese, eggs, and sugar-free sauce. They offer a great alternative to traditional high-carb pizza.

Can I Freeze Pizza Waffles?

Absolutely! Let them cool completely, then wrap in foil or parchment paper and place in a freezer-safe bag. Reheat in the oven or air fryer for best results.

What Waffle Maker Should I Use?

Mini waffle makers are perfect for individual portions. Larger ones work too, but be cautious about overfilling.

Are There Dairy-Free Options?

Yes! Use vegan cheeses and skip traditional meats if you’re dairy-free or plant-based.

How Do I Keep Them Crispy?

Make sure the waffle iron is hot before cooking and avoid adding too much moisture-rich toppings.

Conclusion – Make Pizza Waffles Your New Favorite Snack

If you’re looking for a quick, easy, and ridiculously satisfying dish, pizza waffles check every box. They’re fun to make, endlessly customizable, and fit a variety of diets including keto and low-carb. Plus, they bring the nostalgic comfort of pizza with the crispy joy of waffles.

Now it’s your turn. Gather your ingredients, preheat that waffle maker, and whip up a batch of pizza waffles tonight. Whether you’re meal-prepping or just indulging in a creative food adventure, this recipe is guaranteed to impress.

Have a go at it and tag your creations online! Use #PizzaWaffleMagic and let your followers know how tasty keto can be.

Keto Ground Beef & Veggie Bowl with Cheese Sauce

Keto Ground Beef & Veggie Bowl with Cheese Sauce – A Creamy Low-Carb Dream

Introduction – Why This Bowl Might Just Change Your Keto Journey

You know those evenings when you crave something hearty, comforting, and satisfying, but you still want to stay committed to your low-carb goals? This is where the Keto Ground Beef & Veggie Bowl with Cheese Sauce truly shines. It brings together rich,

seasoned ground beef, vibrant vegetables, and a silky cheese sauce that makes every bite feel indulgent. Unlike typical keto meals that can feel repetitive, this bowl is a refreshing change that satisfies both your appetite and your nutritional needs.

This dish doesn’t just meet your keto requirements – it exceeds them. Whether you’re new to the ketogenic lifestyle or simply need a go-to comfort dish that won’t spike your carbs, this recipe is a reliable and rewarding choice.

What Is the Keto Ground Beef & Veggie Bowl with Cheese Sauce?

A Low-Carb Bowl That Doesn’t Skimp on Flavor

This keto bowl combines:

  • High-quality ground beef for essential protein
  • Fresh or frozen veggies like broccoli and carrots for fiber and color
  • A smooth and creamy cheese sauce made from real, whole ingredients
  • Optional crispy toppings like cheese crisps or pork rinds for texture

Why It’s a Keto Favourite

  • Excellent for batch cooking or weekly meal prep
  • Budget-friendly and quick to prepare
  • Completely customizable depending on your preferences and pantry
  • Keeps you full and fueled without a carb crash

Ingredients Breakdown – What You’ll Need

Name Keto Ground Beef & Veggie Bowl with Cheese Sauce

A satisfying, low-carb comfort dish made with seasoned ground beef, crisp veggies, and a creamy homemade cheese sauce. Perfect for keto meal prep or a quick weeknight dinner.
Prep Time 10 minutes
Cook Time 20 minutes
Total Time 30 minutes
Course Dinner, lunch
Cuisine American, Keto, Low-Carb
Servings 4 servings
Calories 480 kcal

Equipment

  • Large skillet
  • Saucepan
  • Cooking spoon or spatula
  • Cutting board & knife
  • Serving bowl

Ingredients
  

  • Ingredients
  • Main Bowl
  • 1 lb 450g ground beef (80/20)
  • 2 cups broccoli florets
  • 1 cup carrot sticks or zucchini for lower carbs
  • 1/2 cup diced red onion
  • 1/2 cup mixed keto-friendly vegetables optional
  • 1 tbsp olive oil or butter
  • Salt and pepper to taste
  • Cheese Sauce
  • 1/2 cup heavy cream
  • 1 cup shredded cheddar cheese
  • 1 tbsp cream cheese
  • 1/2 tsp garlic powder
  • 1/4 tsp paprika
  • Salt to taste
  • Optional Toppings
  • Cheese crisps or pork rinds for crunch

Instructions
 

  • Instructions
  • Cook the Beef:
  • Heat a skillet over medium-high heat. Brown the ground beef, breaking it apart as it cooks. Season with salt, pepper, and garlic powder. Drain excess fat if needed.
  • Sauté the Vegetables:
  • In another pan, heat olive oil. Add broccoli, carrots, and onions. Cook for 5–7 minutes until slightly tender but still crisp.
  • Make the Cheese Sauce:
  • In a small saucepan, combine heavy cream and cream cheese. Stir over medium heat until smooth. Add shredded cheddar, garlic powder, paprika, and salt. Whisk until creamy and well combined.
  • Assemble the Bowl:
  • Place cooked veggies and beef into a bowl. Drizzle with cheese sauce. Add toppings like cheese crisps or pork rinds if desired.

Notes

Notes
For strict keto, replace carrots with zucchini or cauliflower.
Cheese sauce can be doubled and stored separately.
Store leftovers in airtight containers for up to 4 days.
Use freshly shredded cheese for a smoother sauce.
Keyword keto ground beef bowl, keto cheese sauce recipe, low-carb beef recipe, keto veggie bowl, keto dinner ideas, meal prep keto bowl, keto comfort food

How to Make the Ultimate Keto Ground Beef & Veggie Bowl

Step-by-Step Instructions

Step 1: Cook the Ground Beef

  • Heat a large skillet over medium-high heat.
  • Add ground beef and break it apart with a spatula.
  • Cook until browned and no pink remains.
  • Season with salt, pepper, and garlic powder.
  • Drain excess grease if needed.

Step 2: Saute the Vegetables

  • Heat olive oil in a separate pan over medium heat.
  • Add broccoli, carrots, and onions.
  • Stir occasionally for 5-7 minutes until tender but crisp.

Step 3: Prepare the Cheese Sauce

  • In a saucepan, heat heavy cream and cream cheese on medium.
  • Stir until the cream cheese melts completely.
  • Add shredded cheddar and whisk until smooth.
  • Stir in garlic powder, paprika, and salt.

Step 4: Assemble the Bowl

  • Layer the sauteed vegetables and ground beef in a serving bowl.
  • Pour the cheese sauce over the top generously.
  • Add crunchy toppings like pork rinds or cheese crisps if desired.

Nutritional Information (Per Serving)

  • Calories: 480
  • Protein: 32g
  • Fat: 36g
  • Net Carbs: 6g
  • Fiber: 3g

Note: Nutritional values are estimates and may vary depending on exact ingredients used.

Variations & Add-Ons

Make It Your Own

  • Replace ground beef with ground turkey or sausage
  • Use cauliflower rice instead of carrots for even fewer carbs
  • Add jalapeno slices or hot sauce for heat
  • Experiment with different cheeses like mozzarella or pepper jack

Pro Tips for the Best Results

  • Keep the vegetables slightly crisp for better texture
  • Use freshly shredded cheese for a smoother sauce
  • Store sauce separately if prepping for multiple meals
  • Double the cheese sauce recipe to use in other dishes throughout the week

Frequently Asked Questions (FAQ)

Is the Keto Ground Beef & Veggie Bowl with Cheese Sauce suitable for strict keto?

Yes. It is designed to be low in net carbs, high in fat, and moderate in protein, which aligns with the ketogenic dietary requirements.

Can this recipe be made ahead of time?

Absolutely. This dish is perfect for meal prep. Store it in individual containers for up to four days in the refrigerator.

What are the best low-carb vegetables to use?

Zucchini, spinach, cauliflower, and bell peppers are excellent choices. Avoid starchy vegetables like potatoes or corn.

Can I freeze the leftovers?

Yes, but it’s best to freeze without the cheese sauce. Reheat and add fresh cheese sauce for best texture and taste.

Conclusion

The Keto Ground Beef & Veggie Bowl with Cheese Sauce is more than just another low-carb recipe. It’s a full-flavored, satisfying, and customizable meal that caters to your dietary goals without compromising taste. Whether you need a quick weeknight dinner or a prep-ahead lunch that hits all the right macros, this bowl delivers.

Start cooking today and give your keto routine the comforting twist it deserves. Share it with your fellow low-carb friends, or bookmark it for your next meal prep session.

Air Fryer Chicken Fajitas

If you’re searching for a quick yet flavorful dinner option, look no further than Air Fryer Chicken Fajitas. Imagine a busy weeknight when time is limited but appetites are high; this dish brings the heat and excitement right to your table. With juicy chicken strips,

colorful bell peppers, and savory onions, this recipe not only tantalizes your taste buds but also warms your heart with its homestyle comfort.

What’s more, these fajitas are not just delicious—they’re incredibly versatile. You can customize them to suit your family’s tastes while still keeping meal prep simple and enjoyable.

2. Why Make This Recipe?

Here are three compelling reasons to try Air Fryer Chicken Fajitas:

  • Easy and Quick to Make: With minimal prep time and a rapid cooking method, you’ll have dinner on the table in no time.
  • Budget-Friendly: Utilizing cost-effective ingredients means you can treat your family without breaking the bank.
  • Family Favorite: The bright colors and bold flavors ensure that everyone—kids and adults alike—will enjoy their meal.

3. How to Make Air Fryer Chicken Fajitas

Ingredients

Air Fryer Chicken Fajitas

A vibrant and flavourful dish made with juicy chicken, colourful bell peppers, and onions—all cooked to perfection in the air fryer. Quick, easy, and family-friendly, these fajitas are perfect for weeknight dinners.
Prep Time 10 minutes
Cook Time 18 minutes
Course Dinner, Main Course
Cuisine Mexican, Tex-Mex
Servings 4

Equipment

  • Equipment
  • Air fryer
  • Large bowl
  • Cutting board
  • Knife
  • Tongs or spatula

Ingredients
  

  • Ingredients
  • 3 chicken breasts cut into strips
  • 2 –3 bell peppers any colour, sliced
  • 1 medium onion sliced
  • 2 tablespoons olive oil
  • 1 packet fajita or taco seasoning

Instructions
 

  • Instructions
  • Prep Ingredients: Slice chicken, peppers, and onions.
  • Mix Together: Toss all ingredients in a large bowl with olive oil and fajita seasoning.
  • Preheat Air Fryer: Set air fryer to 360°F (182°C).
  • Cook: Add the mixture to the air fryer basket. Cook for 16–18 minutes, shaking halfway through.
  • Serve: Remove and serve hot in tortillas or over rice. Add toppings like guacamole, sour cream, or salsa.

Notes

Notes
Storage: Refrigerate leftovers for up to 3 days or freeze for up to 2 months.
Reheating: Reheat in the air fryer for 3–5 minutes at 360°F.
Variations: Swap chicken for tofu or beef, and serve with gluten-free or low-carb options like lettuce wraps.
Keyword Air Fryer Chicken Fajitas, Easy Fajita Recipe, Healthy Chicken Dinner, Low-Carb Mexican, Weeknight Air Fryer Meals

Directions

  1. Start by cutting the chicken breasts into strips.
  2. In a large bowl, toss the chicken strips with sliced bell peppers and onions.
  3. Drizzle the olive oil over the mixture, then add the packet of fajita seasoning.
  4. Cover the bowl and give it a good shake to combine everything well.
  5. Preheat your air fryer to 360°F (182°C).
  6. Transfer the mixture to the air fryer basket and cook for 16-18 minutes, shaking the basket halfway through for even cooking.
  7. Once they’re cooked through and beautifully charred, serve hot and enjoy your delicious fajitas!

4. How to Serve Air Fryer Chicken Fajitas

Here are some serving ideas to elevate your fajitas:

  • With Warm Tortillas: Serve the chicken mixture in soft tortillas for a classic fajita experience.
  • Add Toppings: Consider sour cream, guacamole, or salsa for extra flavor.
  • On a Bed of Rice: Serve your fajitas over a bed of rice or quinoa for a hearty meal.

5. How to Store Air Fryer Chicken Fajitas

To store your fajitas properly:

  • Refrigeration: Place leftovers in an airtight container and refrigerate for up to 3 days.
  • Freezing: If you want to keep them longer, freeze in a freezer-safe container for up to 2 months. When ready to eat, thaw in the fridge overnight before reheating.
  • Reheating: Reheat in the air fryer for 3-5 minutes at 360°F or in the microwave in 30-second intervals until heated through.

6. Tips to Make Air Fryer Chicken Fajitas Perfectly

  • Enhance Flavor: Marinate the chicken in lime juice and garlic for at least an hour to give it an extra zing.
  • Avoid Common Mistakes: Do not overcrowd the air fryer basket; give the ingredients room to cook evenly.
  • Cooking Techniques: Use chicken thighs instead of breasts for a juicier texture.
  • Fresh Ingredients: Always use fresh vegetables for the best taste and crunch.

7. Variations (If Any)

Feel free to explore these variations for unique takes on the dish:

  • Vegan Version: Substitute chicken with tofu and use plant-based fajita seasoning.
  • Gluten-Free Adaptation: Use gluten-free tortillas or serve over a salad.
  • Low-Carb Modifications: Skip the tortillas entirely and wrap the filling in lettuce leaves for a keto-friendly meal.

8. Frequently Asked Questions (FAQ)

  • Can I make Air Fryer Chicken Fajitas ahead of time? Yes, you can prepare the ingredients ahead of time and store them in the fridge until you’re ready to cook.
  • What are the best substitutes for chicken? Turkey or lean beef works well too. You can also opt for veggie options like mushrooms or tempeh for a meatless meal.
  • Can I cook this recipe in an oven? Absolutely! If you don’t have an air fryer, roast the mixture in a preheated oven at 400°F (200°C) for about 20-25 minutes.

9. Conclusion

Air Fryer Chicken Fajitas are not just a meal; they’re an experience, bursting with flavor and color. So why not give this delightful recipe a try? You’ll discover a new family favorite that is quick, delicious, and easy to share. Don’t forget to leave a comment, rate the recipe, or share it on social media; we’d love to hear your thoughts and experiences! Happy cooking!

Sheet Pan Cajun Sausage and Shrimp with Veggies

Introduction: A Taste of the South in a Single Pan

If you’re looking for a hearty, flavour-packed dish that saves you time and energy, you’ve found it. This sheet pan Cajun sausage and shrimp with veggies recipe brings the rich, spicy essence of Southern cuisine right to your kitchen.

Sheet Pan Cajun Sausage and Shrimp with Veggies

Best of all, it requires just one pan. Whether you’re preparing a quick dinner after work or feeding your family on a weekend night, this recipe is a go-to.

You don’t need to be a professional chef to serve up something bold, rustic, and satisfying. With the right blend of spices and a few quality ingredients, you can transform a simple protein and vegetable combo into something spectacular.

Why You’ll Love This Sheet Pan Cajun Sausage and Shrimp with Veggies Recipe

Let’s face it, weeknights can be hectic. Between work, errands, and everything else life throws at you, the last thing you want is a complicated recipe. This one-pan meal is the solution to your busy schedule.

Key Benefits:

  • Quick prep and cleanup: Just toss, bake, and you’re done.
  • Well-balanced nutrition: You get lean protein, fibre-rich vegetables, and healthy fats all in one dish.
  • Customisable: Adjust the spice level, change up the vegetables, or swap the sausage type.
  • Perfect for meal prep: This dish stores well and reheats beautifully.

Ingredients for Sheet Pan Cajun Sausage and Shrimp with Veggies

To get started, gather your ingredients. You likely already have most of these in your pantry or fridge.

Ingredient Table:

Sheet Pan Cajun Sausage and Shrimp with Veggies

This bold, flavourful sheet pan Cajun sausage and shrimp with veggies recipe brings the essence of Southern cooking to your kitchen in under 30 minutes. Easy to prepare, customisable, and ideal for busy weeknights or meal prep.
Prep Time 15 minutes
Cook Time 23 minutes
Total Time 38 minutes
Course Dinner
Cuisine American
Servings 4 servings
Calories 360 kcal

Equipment

  • Large sheet pan
  • Mixing bowls
  • Parchment paper or foil
  • Sharp knife and cutting board
  • Measuring spoons

Ingredients
  

  • 1 pound shrimp peeled and deveined, raw
  • 12 oz smoked sausage sliced into 1/2-inch rounds
  • 2 bell peppers any colour, sliced
  • 1 medium zucchini sliced into half-moons
  • 1 medium red onion thinly sliced
  • 2 tablespoons olive oil
  • 1.5 tablespoons Cajun seasoning store-bought or homemade
  • 1 teaspoon garlic powder optional
  • Lemon wedges optional, for serving

Instructions
 

  • Instructions:
  • Preheat your oven to 425°F (220°C). Line a sheet pan with parchment or foil.
  • In a bowl, toss the sausage, bell peppers, zucchini, and onion with 1 tablespoon of olive oil and half the Cajun seasoning.
  • Spread this mixture evenly on the sheet pan and roast for 15 minutes.
  • Meanwhile, toss the shrimp with the remaining olive oil and seasoning.
  • After 15 minutes, add the shrimp to the pan and roast everything for another 8 minutes, or until the shrimp are pink and cooked through.
  • Serve hot, with optional lemon wedges for added brightness.

Notes

For a homemade Cajun seasoning, mix smoked paprika, garlic powder, onion powder, cayenne, oregano, thyme, salt, and pepper.
Use two pans if needed to avoid overcrowding.
Great for meal prep – stores up to 3 days in the fridge.
Easily adjustable spice level based on your preference.
Keyword Sheet pan Cajun sausage and shrimp
Sheet Pan Cajun Sausage and Shrimp with Veggies

Step-by-Step Instructions for Perfect Results

Follow these simple steps and you’ll have a sizzling hot sheet pan of Cajun deliciousness ready in under 30 minutes.

Step-by-Step:

  1. Preheat your oven to 425°F (220°C). Line your sheet pan with foil or parchment paper.
  2. Prepare the vegetables and sausage. Toss the bell peppers, zucchini, red onion, and sausage slices in a bowl with 1 tablespoon of olive oil and half of the Cajun seasoning.
  3. Spread the mixture evenly on the sheet pan. Roast for 15 minutes.
  4. While that cooks, toss your shrimp in the remaining oil and seasoning.
  5. Add the shrimp to the pan after the 15-minute mark. Roast everything for an additional 8 minutes or until the shrimp turn pink and opaque.
  6. Serve hot with a squeeze of lemon juice if desired.

Homemade Cajun Seasoning Mix (Optional)

If you prefer to make your own seasoning, it’s easier than you might think. Here’s a basic mix that hits all the right notes.

DIY Cajun Blend:

  • 1 teaspoon smoked paprika
  • 1 teaspoon garlic powder
  • 1 teaspoon onion powder
  • 1/2 teaspoon cayenne pepper (adjust to taste)
  • 1/2 teaspoon oregano
  • 1/2 teaspoon thyme
  • Salt and pepper to taste

Mix all ingredients together and store in an airtight jar. Use as needed.

Tips for the Best Cajun Sheet Pan Dinner

To get the most out of your sheet pan dinner, keep the following tips in mind:

  • Don’t overcrowd the pan: Use two pans if needed so that ingredients roast instead of steam.
  • Cut evenly: Uniform veggie slices ensure even cooking.
  • Use raw shrimp: Precooked shrimp will overcook and turn rubbery.
  • Customise heat: Reduce the cayenne if you’re not a fan of spice.

Customisation Ideas

You can change up this dish to suit your dietary needs or taste preferences. Here are a few ideas:

Make It Your Own:

  • Low-carb version: Replace high-carb veggies with broccoli, cauliflower, or asparagus.
  • Add starch: Serve with rice, quinoa, or crusty bread if you need a more filling meal.
  • Mix proteins: Try turkey sausage or add a few scallops for variety.

Nutrition Information (Per Serving)

Knowing what you’re eating is part of healthy living. Here’s a general breakdown of the nutritional value:

NutrientAmount (approximate)
Calories360 kcal
Protein32 g
Carbohydrates12 g
Fat22 g
Fibre4 g

Frequently Asked Questions about Sheet Pan Cajun Sausage and Shrimp with Veggies

Can I use frozen shrimp for sheet pan Cajun sausage and shrimp with veggies?

Yes, just make sure they are fully thawed and dried before use.

What vegetables work best?

Bell peppers, zucchini, onions, broccoli, asparagus, and cherry tomatoes all roast well and pair beautifully with Cajun seasoning.

How do I store and reheat leftovers?

Place leftovers in an airtight container and store in the fridge for up to three days. Reheat in the oven or microwave.

Can I make it less spicy?

Absolutely. Just reduce or omit the cayenne pepper in the seasoning.

Is this dish keto-friendly?

Yes. Just avoid starchy vegetables like corn or potatoes.

Conclusion: A One-Pan Meal That Delivers Every Time

When your week is full and your energy is low, this sheet pan Cajun sausage and shrimp with veggies recipe delivers bold flavours without draining your time. With its simple prep, flexible ingredients, and deep, spicy flavour, this dish is guaranteed to become a regular on your dinner table.

Ready to try it tonight? Pull out your sheet pan and get cooking. You’ll be surprised just how easy it is to make something this delicious, this fast.

Hungry for more one-pan wonders? Sign up for our newsletter to get fresh, flavour-packed recipes sent straight to your inbox.

Keto Pizza Roll Ups

1. Introduction

Are you craving a delicious snack that’s also on the healthy side? Picture yourself indulging in a cheesy, savory pizza flavor packed into a rolled-up snack that won’t derail your diet. These Keto Pizza Roll Ups

Keto Pizza Roll Ups

are not just a quick fix for your cravings; they bring the nostalgic taste of pizza right to your fingertips without the guilt associated with traditional options.

The moment you take a bite, the warm, melted mozzarella combined with the zesty pepperoni and aromatic Italian seasoning dances on your taste buds. Each roll offers the satisfying texture of a crunchy exterior with a gooey interior, making these bites a unique and enjoyable treat that everyone will love.

2. Why Make This Recipe?

Making Keto Pizza Roll Ups is a fantastic choice for several reasons:

  • Easy and Quick: With just a few simple ingredients, you can whip these up in no time—perfect for a quick snack or appetizer.
  • Budget-Friendly: Using everyday ingredients means you won’t break the bank, making these roll-ups an accessible treat for everyone.
  • Family Favorite: Kids and adults alike will enjoy this low-carb option, pleasing even the pickiest eaters at your table.
  • Healthy and Diet-Friendly: This recipe keeps carbs low while satisfying your pizza cravings, aligning perfectly with keto and low-carb diets.

3. How to Make Keto Pizza Roll Ups

Ingredients

Keto Pizza Roll Ups

These Keto Pizza Roll Ups are the perfect low-carb snack or appetiser—cheesy, crispy, and packed with your favourite pizza flavours without the carbs. Great for a quick lunch or a party platter.

Equipment

  • Baking sheet
  • Parchment paper or silicone baking mat
  • Oven
  • Spatula or tongs

Ingredients
  

  • Ingredients
  • 1 cup shredded mozzarella cheese
  • 10 slices of pepperoni
  • 1 tsp Italian seasoning
  • 1 tbsp low-carb marinara sauce optional, for dipping

Instructions
 

  • Instructions
  • Preheat your oven to 400°F (200°C).
  • Line a baking sheet with parchment paper or a silicone mat.
  • Place small piles of shredded mozzarella (about 2 tablespoons each) on the baking sheet, spaced evenly.
  • Sprinkle each pile with a pinch of Italian seasoning.
  • Place a slice of pepperoni in the centre of each cheese pile.
  • Bake for 6–8 minutes, or until the edges are golden and bubbly.
  • Let them cool for 1–2 minutes, then use a spatula to roll them up while still pliable.
  • Serve warm with marinara sauce for dipping if desired.

Notes

Notes
You can swap pepperoni for other keto-friendly toppings like cooked sausage or mushrooms.
For extra crispiness, let them cool slightly longer before rolling.
Store leftovers in the fridge and reheat in the oven to keep them crisp.
Keto Pizza Roll Ups

Directions

  1. Preheat your oven to 350°F (175°C).
  2. Lay out the mozzarella slices on a baking sheet. Ensure they’re spaced out for even melting.
  3. Sprinkle with Italian seasoning and add chili flakes if you desire some heat.
  4. Layer the pepperoni slices generously on top of the cheese.
  5. Bake in the preheated oven for about 5 minutes, or until the cheese is beautifully melted.
  6. Let cool slightly before rolling each piece up to avoid burns.
  7. Serve with keto-friendly marinara on the side, or enjoy them plain for a simple yet delicious snack.

4. How to Serve Keto Pizza Roll Ups

Here are a few ideas to make your Keto Pizza Roll Ups even more enjoyable:

  • Side of Dips: Pair them with a side of keto-friendly marinara or ranch dressing for dipping.
  • Salad Pairing: Complement your roll-ups with a fresh garden salad for a well-rounded meal.
  • Creative Presentation: Arrange them on a platter and garnish with fresh basil for a touch of elegance.

5. How to Store Keto Pizza Roll Ups

Storing your Keto Pizza Roll Ups is simple:

  • Refrigeration: Store in an airtight container in the fridge for up to 3 days.
  • Freezing: For longer storage, you can freeze them. Place them in a single layer on a baking sheet until solid, then transfer to a freezer bag. They can last up to 2 months.
  • Reheating: To reheat, bake in the oven at 350°F until heated through (about 10 minutes), or microwave for a quick fix, but the oven method helps maintain crispiness.

6. Tips to Make Keto Pizza Roll Ups Perfectly

Here are some expert tips to enhance your Keto Pizza Roll Ups:

  1. Experiment with Cheese: Try different cheeses for varying flavors; gouda or cheddar can add a delightful twist.
  2. Avoid Over-Cooking: Keep an eye on the cheese; you want it melted, not browned.
  3. Uniform Thickness: Ensure your mozzarella slices are of uniform thickness, so they melt evenly.
  4. Add Veggies: For extra nutrition, consider adding some sautéed spinach or mushrooms inside the rolls.

7. Variations (If Any)

Feel free to modify the Keto Pizza Roll Ups according to your dietary needs:

  • Vegan or Vegetarian Version: Use vegan cheese and leave out the pepperoni for a plant-based alternative.
  • Gluten-Free Adaptation: Ensure all ingredients are gluten-free, including any seasonings or marinara you use.
  • Different Proteins: Swap pepperoni for ham, chicken, or even vegetables if you prefer to get creative.

8. Frequently Asked Questions (FAQ)

Can I make Keto Pizza Roll Ups ahead of time?

Yes, you can prepare the ingredients and store them separately until ready to bake.

What are the best substitutes for mozzarella?

Provolone or gouda are excellent alternatives if you want to switch things up.

Can I cook this recipe in an air fryer?

Absolutely! Air fry them for about 3-4 minutes at 350°F for a quick and crispy version.

9. Conclusion

In summary, Keto Pizza Roll Ups are a delicious and easy-to-make snack that kids and adults will love. Their low-carb profile makes them an excellent option for those on a keto or low-carb diet, while their cheesy, savory flavor satisfies cravings without the guilt.

Now it’s your turn! Try this recipe, share your experience, and let us know how your Keto Pizza Roll Ups turned out in the comments below. Don’t forget to rate the recipe and share it on social media with your friends and family!

Cheesy Cabbage Casserole

Cheesy Cabbage Casserole

If you’re craving a comforting, cheesy dish but want to keep it low-carb, look no further than Cheesy Cabbage Casserole. This hearty casserole is the perfect combination of tender cabbage, melty cheese, and savoury flavours that will warm you up without the added carbs.

Cheesy Cabbage Casserole

Whether you’re following a keto or low-carb diet, or simply want a delicious side dish to accompany your meal, Cheesy Cabbage Casserole is sure to become a family favourite. Let’s dive into how to make this simple yet flavour-packed dish that will leave everyone asking for seconds!


Why Cheesy Cabbage Casserole is a Must-Try

Cabbage may not always be the first vegetable that comes to mind when thinking about comfort food, but this Cheesy Cabbage Casserole will change that. Here’s why it should be on your table:

Low-Carb, High-Taste

This casserole is a great alternative to higher-carb sides like mashed potatoes or pasta dishes. By using cabbage as the base and adding rich, creamy cheese, you can enjoy all the comforting flavours you love, without the extra carbs. It’s perfect for anyone on a keto, low-carb, or even gluten-free diet.

Simple Ingredients, Big Flavour

One of the best parts about Cheesy Cabbage Casserole is how simple it is to make. You only need a handful of ingredients to create a dish that’s loaded with flavour and texture. From the creaminess of the cheese to the natural sweetness of the cabbage, every bite is satisfying.

Perfect as a Side or Main Dish

This casserole can be enjoyed as a side dish, but it’s hearty enough to be the main event. Add some protein, like grilled chicken or sausage, and you’ve got yourself a complete meal. Plus, it’s an excellent way to get more vegetables into your diet in a tasty way!


What You Need to Make Cheesy Cabbage Casserole

Before you begin preparing this dish, make sure you have all the necessary ingredients and tools. Here’s a quick rundown of what you’ll need:

Essential Ingredients for Cheesy Cabbage Casserole

IngredientAmountNotes
Cabbage (Shredded)4 cupsFresh cabbage, shredded into thin strips
Cream Cheese (Softened)8 oz (226g)Adds richness and creaminess to the casserole
Cheddar Cheese (Shredded)1½ cupsFull-fat, shredded cheddar cheese
Sour Cream½ cupAdds tang and creaminess
Butter2 tbspFor sautéing and flavour
Garlic Powder1 tspFor extra savoury flavour
Onion Powder½ tspEnhances the flavour of the cabbage
Salt and PepperTo tasteFor seasoning
Bacon (Optional)3 slicesAdds a smoky flavour, optional but delicious
Baking Dish1 (9×9 or similar)For baking the casserole

Necessary Tools

  • Shredding tool: A knife or food processor for shredding the cabbage.
  • Large pan: To sauté the cabbage.
  • Baking dish: To assemble and bake the casserole.
  • Mixing spoon: For combining the ingredients.
  • Oven: For baking the casserole.

Cheesy Cabbage Casserole

Step-by-Step Guide to Making Cheesy Cabbage Casserole

Now that you have all your ingredients and tools ready, let’s get started on preparing this delicious Cheesy Cabbage Casserole. Follow these easy steps to make the perfect dish.

Prepare the Cabbage

  1. Shred the Cabbage: Begin by shredding the cabbage into thin strips. You can use a knife, mandoline, or food processor to make this process quicker. Set the shredded cabbage aside.
  2. Sauté the Cabbage: In a large pan, melt the butter over medium heat. Add the shredded cabbage and sauté for about 5-7 minutes, or until the cabbage starts to soften. You want the cabbage to be tender but still have some texture.

Prepare the Cheese Mixture

  1. Combine the Cream Cheese, Sour Cream, and Cheddar: In a separate bowl, mix together the softened cream cheese, sour cream, and shredded cheddar cheese. Stir until smooth and well combined.
  2. Season: Add garlic powder, onion powder, salt, and pepper to taste. Stir to incorporate the seasonings evenly into the cheese mixture.

Assemble the Casserole

  1. Combine the Cabbage and Cheese: Once the cabbage is tender, remove it from the heat and add it to the cheese mixture. Stir everything together until the cabbage is well-coated with the creamy cheese sauce.
  2. Optional: Add Bacon: If you’re using bacon, chop the cooked bacon into small pieces and mix it into the casserole for an extra layer of flavour. The bacon will add a delicious smoky crunch that complements the creamy cabbage perfectly.
  3. Transfer to Baking Dish: Spoon the cabbage and cheese mixture into a greased baking dish (9×9 or similar size works well). Spread it out evenly in the dish.

Bake the Casserole

  1. Preheat the Oven: Set your oven to 350°F (175°C) and allow it to preheat while you prepare the casserole.
  2. Bake: Place the casserole in the preheated oven and bake for 20-25 minutes, or until the cheese is melted, bubbly, and slightly golden on top.
  3. Cool and Serve: Once the casserole is done, remove it from the oven and let it cool for a few minutes before serving. This will help the flavours meld together and make it easier to serve.

Tips for Perfect Cheesy Cabbage Casserole Every Time

To make sure your Cheesy Cabbage Casserole turns out perfectly every time, follow these helpful tips:

Don’t Overcook the Cabbage

When sautéing the cabbage, keep an eye on it to avoid overcooking. You want the cabbage to soften, but still retain some texture. Overcooked cabbage can become too mushy and may not hold up well in the casserole.

Use Full-Fat Cheese and Cream Cheese

For the best flavour and texture, opt for full-fat cream cheese and cheddar cheese. These ingredients give the casserole a rich, creamy texture and enhance the overall taste.

Add Extra Veggies

If you want to make this dish even more nutritious, consider adding extra vegetables. Bell peppers, mushrooms, or spinach can be easily incorporated into the casserole for added flavour and colour.


Variations of Cheesy Cabbage Casserole

While this Cheesy Cabbage Casserole is delicious on its own, there are plenty of ways to make it your own:

Add Ground Meat

For a heartier meal, you can add cooked ground beef, turkey, or sausage to the casserole. Simply cook the meat and mix it with the cabbage and cheese before baking.

Make It Spicy

If you like a little heat, consider adding some diced jalapeños, red pepper flakes, or a pinch of cayenne pepper to the casserole for a spicy kick.

Top with Crispy Onions

For an extra crunch, top the casserole with crispy fried onions before baking. This adds a delightful texture contrast and elevates the flavour.


Health Benefits of Cheesy Cabbage Casserole

Not only is Cheesy Cabbage Casserole incredibly delicious, but it’s also packed with health benefits, especially for those following a low-carb or keto diet:

Rich in Fibre

Cabbage is a great source of fibre, which aids digestion and helps keep you feeling full. Adding cabbage to your diet is an easy way to boost your fibre intake.

Low-Carb and Keto-Friendly

This casserole is low in carbs, making it perfect for anyone following a keto or low-carb diet. By using cabbage as the base and a sugar-free creamy sauce, you can enjoy a comfort food classic without derailing your diet.

Packed with Nutrients

Cabbage is full of essential nutrients like vitamin C, potassium, and antioxidants. These nutrients help support your immune system, maintain heart health, and promote overall wellness.


FAQs About Cheesy Cabbage Casserole

Can I make Cheesy Cabbage Casserole ahead of time?

Yes, you can prepare the casserole ahead of time and refrigerate it before baking. Just make sure to let it come to room temperature before baking, or increase the baking time by a few minutes if baking from cold.

Can I freeze Cheesy Cabbage Casserole?

Yes, you can freeze the casserole before or after baking. If freezing before baking, cover it tightly with plastic wrap and foil. When ready to bake, simply thaw in the fridge overnight and bake as usual.

Can I use different types of cheese?

Absolutely! Feel free to experiment with different cheeses like mozzarella, Monterey Jack, or even a spicy pepper jack for a unique twist. Each cheese will bring its own flavour profile to the dish.


Conclusion:

Cheesy Cabbage Casserole is a comforting, low-carb dish that’s perfect for any occasion. Whether you’re following a keto diet, looking for a new side dish, or craving a cheesy, vegetable-packed meal, this casserole is a winner. With its rich flavour, creamy texture, and easy preparation, it’s a dish that will satisfy everyone at the table.


Call-to-Action: Ready to enjoy a warm, cheesy, and low-carb dish? Try making Cheesy Cabbage Casserole today and let us know how it turned out! Share your favourite variations and tips for the perfect casserole in the comments!

Keto Cheesy Garlic Sausage Balls

Keto Cheesy Garlic Sausage Balls

If you’re following a keto diet and craving a delicious, savoury snack that’s both cheesy and packed with flavour, then Keto Cheesy Garlic Sausage Balls are exactly what you need. These bite-sized treats are low in carbs but full of flavour, making them the perfect snack for anyone looking to indulge without breaking their diet.

Keto Cheesy Garlic Sausage Balls

Whether you’re preparing for a party, a game day, or simply looking for a satisfying snack, these sausage balls will become a staple in your kitchen. Let’s dive into the steps to make this mouthwatering dish and why it’s the perfect keto-friendly snack.

Why Keto Cheesy Garlic Sausage Balls Are a Must-Try

If you’re a fan of cheesy, savoury snacks but want to keep your carb intake in check, Keto Cheesy Garlic Sausage Balls are an absolute game-changer. Here’s why they should be your next go-to snack:

Low-Carb, High-Taste

Traditional sausage balls often rely on breadcrumbs or flour to hold them together, but not these! By substituting breadcrumbs with almond flour or coconut flour, these sausage balls are keto-friendly and completely guilt-free. With just a few simple ingredients, you’ll be able to enjoy all the cheesy, garlicky goodness without compromising your carb limit.

Quick and Easy to Prepare

Making these sausage balls is a breeze. They come together quickly, require minimal prep, and cook in under 25 minutes. Perfect for busy days when you need a quick snack or need to whip up something for a gathering.

Full of Protein and Healthy Fats

Thanks to the sausage, cheese, and eggs, these balls are a great source of protein and healthy fats. They’ll keep you full and satisfied for hours, making them an ideal snack for a keto diet that focuses on satiety and energy.

What You Need to Make Keto Cheesy Garlic Sausage Balls

Before you get started, it’s important to gather all your ingredients and tools to ensure a smooth cooking process. Here’s what you’ll need:

Essential Ingredients for Keto Cheesy Garlic Sausage Balls

IngredientAmountNotes
Ground Sausage1 lb (450g)Choose a high-quality, sugar-free sausage
Almond Flour1 cupThis replaces breadcrumbs for a keto-friendly option
Cheddar Cheese (Shredded)1½ cupsUse full-fat cheese for the best flavour
Garlic Powder1 tspAdds a rich, savoury depth to the flavour
Egg1 largeHelps bind the ingredients together
Cream Cheese (Softened)2 oz (56g)Adds creaminess and moisture
Baking Powder1 tspTo help the sausage balls rise slightly
Salt and PepperTo tasteFor seasoning
Optional: Parmesan Cheese½ cupOptional for added flavour and richness

Necessary Tools

  1. Mixing bowl: For combining the ingredients.
  2. Baking sheet: To bake the sausage balls.
  3. Parchment paper: To line the baking sheet and prevent sticking.
  4. Spoon or your hands: To form the sausage balls.
  5. Oven: For baking the balls to perfection.
Keto Cheesy Garlic Sausage Balls

Step-by-Step Guide to Making Keto Cheesy Garlic Sausage Balls

Making Keto Cheesy Garlic Sausage Balls is simple and quick. Follow these steps to prepare a batch of these cheesy, flavour-packed snacks:

Prepare the Ingredients

  1. Preheat the Oven: Start by preheating your oven to 375°F (190°C). This ensures the sausage balls cook evenly and get a golden, crispy exterior.
  2. Prepare the Baking Sheet: Line a baking sheet with parchment paper to prevent the sausage balls from sticking during baking.

Combine the Ingredients

  1. Mix the Sausage and Cheese: In a large mixing bowl, combine the ground sausage, shredded cheddar cheese, and softened cream cheese. Use your hands or a spoon to mix everything together until it’s evenly combined.
  2. Add the Dry Ingredients: To the sausage and cheese mixture, add the almond flour, garlic powder, salt, pepper, and baking powder. Mix again until everything is well incorporated.
  3. Add the Egg: Crack the egg into the mixture and stir until it helps bind everything together. The egg adds structure and moisture to the sausage balls.

Form the Sausage Balls

  1. Shape the Balls: Using your hands or a spoon, form the mixture into small balls—about 1 inch in diameter. You can make them slightly larger if you prefer, but keeping them around 1 inch will ensure they cook evenly.
  2. Place on the Baking Sheet: Arrange the sausage balls on the prepared baking sheet, spacing them about an inch apart. This allows them to cook evenly and get crispy on all sides.

Bake the Sausage Balls

  1. Bake for 20-25 Minutes: Pop the sausage balls into the preheated oven and bake for 20-25 minutes, or until they’re golden brown and cooked through. The cheese will melt and become slightly crispy on the edges, creating the perfect texture.
  2. Cool and Serve: Once cooked, remove the sausage balls from the oven and let them cool for a few minutes. Then, they’re ready to serve! Enjoy them on their own, or dip them in a low-carb ranch or marinara sauce for extra flavour.

Tips for Perfect Keto Cheesy Garlic Sausage Balls Every Time

To ensure your Keto Cheesy Garlic Sausage Balls turn out perfect each time, follow these tips:

Use Full-Fat Sausage and Cheese

For the best flavour and texture, always opt for full-fat sausage and cheese. These ingredients will not only enhance the taste of your sausage balls but also keep them moist and satisfying.

Experiment with Spices and Flavours

While garlic powder is a classic choice, don’t be afraid to get creative with your seasonings. You could try adding a pinch of cayenne for some heat, or incorporate Italian seasoning for a herby twist.

Don’t Overmix

When combining the ingredients, try not to overmix the sausage mixture. Overmixing can result in tough sausage balls. Mix just enough to incorporate all the ingredients.

Make Them Mini for Appetizers

If you’re making these for a party or gathering, try making the sausage balls smaller. Mini sausage balls are perfect for appetizers and are easy to serve and snack on.


Variations of Keto Cheesy Garlic Sausage Balls

Keto Cheesy Garlic Sausage Balls are incredibly versatile. Here are some variations you can try:

Add Spinach for Extra Veggies

Add finely chopped spinach to the mixture to sneak in some extra greens. This not only boosts the nutritional value but also adds a pop of colour to the sausage balls.

Try Different Cheese Varieties

Switch up the cheese for a different flavour profile. Parmesan cheese, mozzarella, or even a spicy pepper jack can be used in place of cheddar for a unique twist.

Use Turkey or Chicken Sausage

If you’re not a fan of pork sausage, try using turkey or chicken sausage for a leaner option. These meats work well in the recipe and offer a lighter version of the dish.


Health Benefits of Keto Cheesy Garlic Sausage Balls

These cheesy, garlicky sausage balls aren’t just delicious—they’re packed with health benefits, especially for those on a keto diet.

High in Protein

With sausage and cheese as the main ingredients, these sausage balls provide a hefty dose of protein. Protein is essential for muscle repair, growth, and overall health, making these balls a great post-workout snack or meal.

Rich in Healthy Fats

Healthy fats from cheese, sausage, and cream cheese provide long-lasting energy and help keep you feeling full. These fats are essential on a keto diet to keep your body in a state of ketosis.

Low in Carbs

Traditional sausage balls are usually loaded with carbs from flour or breadcrumbs. By using almond flour, these sausage balls are low in carbohydrates, which helps keep your blood sugar levels stable and supports ketosis.

FAQs About Keto Cheesy Garlic Sausage Balls

Can I make Keto Cheesy Garlic Sausage Balls in advance?

Yes! You can make these sausage balls ahead of time and store them in the fridge for up to 3 days. To reheat, simply pop them in the oven or microwave.

Can I freeze Keto Cheesy Garlic Sausage Balls?

Absolutely! These sausage balls freeze very well. After baking, let them cool completely and store them in an airtight container or freezer bag. When you’re ready to enjoy them, just reheat them in the oven for a few minutes.

Can I substitute almond flour with coconut flour?

Yes, you can substitute coconut flour, but keep in mind that coconut flour absorbs more liquid than almond flour. If using coconut flour, reduce the amount to about ¼ cup and add an additional egg to maintain the right texture.

Conclusion:

Keto Cheesy Garlic Sausage Balls are the perfect snack, appetizer, or meal for anyone following a low-carb, high-fat diet. They’re cheesy, garlicky, and full of satisfying flavours, all while being keto-friendly. Whether you’re preparing them for a party, an afternoon snack, or a meal prep option, these sausage balls will quickly become a staple in your kitchen.

Call-to-Action: Ready to make your own batch of Keto Cheesy Garlic Sausage Balls? Gather your ingredients, preheat your oven, and start cooking! Once you’ve tried these, share your thoughts and let us know how you personalised them to suit your taste!

Air Fryer Zucchini

Air Fryer Zucchini

If you’re on the lookout for a healthier way to enjoy crispy snacks without compromising on taste, you’ve come to the right place. Air fryer zucchini is a game-changing recipe that allows you to indulge in a crunchy, golden snack with minimal oil and maximum flavour.

Air Fryer Zucchini

Whether you’re aiming to eat more veggies or just want a new, tasty treat, air fryer zucchini is the perfect solution. Let’s dive into how you can make this crispy, delicious snack in your air fryer with ease!

Why Air Fryer Zucchini is the Perfect Snack

If you’ve ever found yourself searching for a healthier alternative to fried snacks, air fryer zucchini will quickly become your favourite. Here’s why:

Healthier than Traditional Fried Zucchini

When you air fry zucchini, you drastically reduce the amount of oil needed compared to traditional deep frying. This means fewer calories and less fat, but still the satisfying crunch that we all love. By using only a small amount of oil, you retain the fresh, crisp nature of zucchini without the heaviness that often comes with fried foods. Not only does this make it a guilt-free snack, but it also preserves more of the vegetable’s natural nutrients.

Quick and Easy

If you’re someone who’s always on the go, air fryer zucchini is perfect for you. The prep time is quick—within minutes you’ll have your zucchini sliced and ready to go. And the air fryer works its magic in about 10 minutes, giving you a crispy snack without the hassle of turning on the stove or oven. Plus, the clean-up is minimal, making it an ideal snack for busy days or last-minute cravings.

What You Need to Make Air Fryer Zucchini

Before you dive into cooking, it’s important to gather all the right ingredients and tools to ensure a perfect result. Here’s a quick rundown of what you’ll need:

Essential Ingredients for Air Fryer Zucchini

IngredientAmountNotes
Zucchini2 medium-sizedFresh, washed, and sliced
Olive Oil or Cooking Spray1-2 tbspTo lightly coat zucchini slices
Parmesan Cheese¼ cupOptional for a cheesy finish
Garlic Powder½ tspAdds extra flavour
Salt and PepperTo tasteFor seasoning
Optional: Breadcrumbs¼ cupFor extra crunch

Necessary Tools

  • Air fryer: The key to crispy, perfectly cooked zucchini.
  • Cutting board and knife: For slicing your zucchini.
  • Bowl for mixing: A simple bowl to toss the zucchini with oil and seasonings.
  • Tongs or spatula: To flip the zucchini slices halfway through cooking.
Air Fryer Zucchini

Step-by-Step Guide to Air Fryer Zucchini

Now that you have your ingredients and tools ready, let’s get cooking! Follow these simple steps to make the perfect air fryer zucchini:

Preparing the Zucchini

  1. Wash and Slice the Zucchini: Start by thoroughly washing the zucchini to remove any dirt. Once it’s clean, slice it into ½-inch thick rounds or long strips—whichever shape you prefer. If you’re going for “zucchini fries,” aim for long strips that resemble fries.
  2. Dry the Zucchini: To avoid excess moisture that could lead to soggy zucchini, gently pat the slices dry with a paper towel.

Seasoning Your Zucchini

  1. Toss with Olive Oil: In a mixing bowl, drizzle olive oil over your zucchini slices. This will help the seasonings stick and ensure that they crisp up in the air fryer.
  2. Add Seasonings: Sprinkle garlic powder, salt, and pepper to taste. If you’re feeling adventurous, you can also add paprika, Italian seasoning, or cayenne pepper for an extra kick. Toss everything together to ensure each piece is evenly coated.
  3. Optional Add-ins: For added flavour and texture, sprinkle Parmesan cheese or breadcrumbs over your zucchini slices. The cheese will melt and create a beautiful golden crust, while the breadcrumbs will add an extra crunch.

Air Frying the Zucchini

  1. Preheat the Air Fryer: Set your air fryer to 375°F (190°C) and preheat it for a few minutes. Preheating ensures that your zucchini cooks evenly and gets crispy.
  2. Arrange the Zucchini: Place the zucchini slices in a single layer in the air fryer basket. Be careful not to overcrowd the basket—this allows the hot air to circulate freely, resulting in even cooking.
  3. Cook the Zucchini: Air fry for about 10-12 minutes, flipping the zucchini halfway through to ensure both sides are evenly crispy. You’ll know it’s done when the zucchini is golden brown and crispy on the outside, yet tender on the inside.

Tips for Perfect Air Fryer Zucchini Every Time

To make sure your air fryer zucchini turns out perfect every time, here are a few tips to follow:

  • Don’t Overcrowd the Basket: It might be tempting to load the basket with a ton of zucchini, but overcrowding can lead to uneven cooking. Keep some space between the slices to allow air to circulate and crisp up the zucchini properly.
  • Experiment with Seasonings: While garlic powder and Parmesan cheese are classic choices, don’t hesitate to get creative with your seasonings. Try using herbs like thyme, rosemary, or oregano for a more aromatic flavour, or spice things up with some chili flakes or paprika.
  • Avoid Soggy Zucchini: Zucchini has a high water content, so make sure to pat the slices dry before tossing them in oil and seasonings. This helps avoid excess moisture during cooking, which can make your zucchini soggy.

Variations of Air Fryer Zucchini Recipes

If you’re ready to take your air fryer zucchini to the next level, here are a few fun variations to try:

Air Fryer Zucchini Fries

  • Coat your zucchini strips in a mixture of breadcrumbs, Parmesan cheese, and your favourite seasonings. This will give them an extra crispy, crunchy texture. Serve them with marinara sauce for dipping, and you’ve got a perfect snack or side dish!

Air Fryer Zucchini Chips

  • Slice the zucchini thinly and season it simply with salt and pepper. These chips are the perfect alternative to potato chips and are a great low-carb option for snacking.

Air Fryer Zucchini with Balsamic Glaze

  • After air frying, drizzle your zucchini with a balsamic glaze for an added layer of flavour. This makes for an excellent side dish to any meal or a refreshing topping for salads.

Health Benefits of Eating Zucchini

Beyond being a tasty snack, zucchini is also incredibly nutritious. Here’s why you should consider incorporating it into your diet:

Rich in Nutrients

Zucchini is packed with vitamins and minerals, including Vitamin A, Vitamin C, and potassium. These nutrients are essential for boosting your immune system, maintaining healthy skin, and keeping your heart in top shape.

Low in Calories

If you’re looking to maintain or lose weight, zucchini is an excellent choice. With only around 20 calories per cup, it’s an incredibly low-calorie food that helps you feel full without consuming excess calories.

High in Antioxidants

Zucchini contains antioxidants like lutein and zeaxanthin, which are particularly good for eye health. These antioxidants help protect your eyes from damage caused by free radicals and can prevent age-related eye conditions.

Hydrating

With a high water content, zucchini helps keep you hydrated, especially during the warmer months. Staying hydrated is essential for your overall health and helps maintain energy levels throughout the day.

FAQs About Air Fryer Zucchini

Can I make air fryer zucchini without oil?

Yes, you can! If you want to make a lighter version, simply skip the oil or use a light cooking spray. The zucchini will still turn out crispy, but without the added fat.

Can I use frozen zucchini for air frying?

While frozen zucchini can technically be air-fried, it might not yield the same crispy texture as fresh zucchini. If you do decide to use frozen zucchini, make sure to thaw it completely and pat it dry to remove excess moisture before cooking.

How do I store leftover air fryer zucchini?

Leftover air fryer zucchini can be stored in an airtight container in the fridge for up to 2 days. To reheat, simply pop it back into the air fryer for a couple of minutes to restore its crispiness.

Conclusion:

Air fryer zucchini is not just a healthy alternative to fried snacks; it’s a delicious, versatile dish that can be made in minutes. Whether you’re enjoying it as a snack, side dish, or even a light meal, zucchini is a fantastic way to enjoy something crispy and flavourful without the added fat. So why not give it a try? With just a few simple ingredients and a few minutes in the air fryer, you’ll have a crispy, nutritious treat that’s perfect for any occasion.

Call-to-Action: If you’re ready to enjoy your own batch of crispy air fryer zucchini, grab your zucchini, air fryer, and a few simple ingredients. Try it out today and let us know what your favourite seasoning combinations are!

Cheesy Keto Snack Bites

Cheesy Keto Snack Bites

1. Introduction

Are you ready to indulge in a deliciously cheesy snack that won’t sabotage your diet? Let me take you back to my childhood memories of cheesy delights—those crispy, gooey bites that made every family gathering feel special. These Cheesy Keto Snack Bites are not just another snack; they’re a game changer for anyone following a keto lifestyle.

Cheesy Keto Snack Bites

With a perfect blend of textures—crunchy on the outside and gooey on the inside—they promise to satisfy your cheese cravings without the carbs. Let’s dive into why this recipe deserves a spot in your kitchen!

2. Why Make This Recipe?

Here’s why you’ll love making these Cheesy Keto Snack Bites:

  • Easy and Quick to Make: With just a few simple steps, you’ll have a warm and cheesy snack in no time.
  • Budget-Friendly: Made with common ingredients, this recipe won’t break the bank.
  • Family Favorite: Kids and adults alike will love their cheesy goodness!
  • Healthy Option: They’re low-carb, making them a perfect snack for those on keto or low-carb diets.

3. How to Make Cheesy Keto Snack Bites

Ingredients

Here’s a handy table of the ingredients you’ll need:

IngredientQuantityNotes
Shredded Cheddar Cheese1 cupSharp cheddar works best
Cream Cheese4 oz (½ block)Softened to room temperature
Almond Flour½ cupBlanched almond flour preferred
Eggs2Medium or large
Baking Powder1 tspHelps fluff the bites slightly
Garlic Powder½ tspOptional, for extra flavour
Onion Powder½ tspOptional, enhances savouriness
Crushed Red Pepper Flakes¼ tspOptional, for a hint of spice
Salt & PepperTo tasteAdjust according to your preference
Cheesy Keto Snack Bites

Directions

Follow these steps for a perfect batch of Cheesy Keto Snack Bites:

  1. Preheat your oven to 350°F (175°C) and line a baking sheet with parchment paper.
  2. In a large mixing bowl, combine the shredded cheddar, shredded mozzarella, and softened cream cheese. Mix until well combined.
  3. Add in the almond flour, egg, garlic powder, onion powder, paprika, salt, and pepper. Stir until a dough forms. If you’re feeling fancy, fold in the chopped chives for that extra zing!
  4. Scoop tablespoon-sized portions of the mixture and roll them into balls. Place the balls on the prepared baking sheet, ensuring to space them about 2 inches apart.
  5. Bake in the preheated oven for 15-20 minutes, or until they’re golden brown and bubbly.
  6. Allow to cool slightly before serving. These cheesy bites are best enjoyed warm or at room temperature!

4. How to Serve Cheesy Keto Snack Bites

Here are a few serving suggestions to elevate your cheesy treat:

  • Dipping Sauce: Pair them with a side of marinara or garlic aioli for extra flavor.
  • Salad Side: Serve with a fresh green salad to balance the richness of the snack.
  • Presentation: Arrange them on a platter with fresh herbs for a pop of color and appeal.

5. How to Store Cheesy Keto Snack Bites

Storing your Cheesy Keto Snack Bites properly ensures they’ll stay delicious:

  • Refrigeration: Store in an airtight container in the fridge for up to 5 days.
  • Freezing: Freeze baked bites in a single layer, then transfer to a freezer-safe container. They can be kept frozen for up to 3 months.
  • Reheating: To reheat, bake directly from the freezer at 350°F (175°C) for about 10-15 minutes or until heated through.

6. Tips to Make Cheesy Keto Snack Bites Perfectly

To really nail this recipe, consider these expert tips:

  • Enhancing Flavor: Add a pinch of cayenne pepper for a little kick!
  • Common Mistakes: Don’t overmix the dough; it can lead to tough bites.
  • Cooking Techniques: For the best texture, ensure the cheese mixture is well-combined but still retains some lumps.
  • Optional Add-Ins: Consider folding in cooked bacon bits or diced bell peppers for extra flavor.

7. Variations (If Any)

Feel free to get creative with these variations:

  • Vegan Version: Use vegan cheese and egg replacer for a plant-based alternative.
  • Gluten-Free Adaptation: Substitute almond flour with coconut flour for those avoiding gluten.
  • Low-Carb Modifications: Incorporate nutritional yeast for a cheesy flavor without the dairy.

8. Frequently Asked Questions (FAQ)

Here are some common questions about this recipe:

  • Can I make Cheesy Keto Snack Bites ahead of time? Yes! You can prepare the dough in advance and bake just before serving.
  • What are the best substitutes for almond flour? Coconut flour can be a good alternative, but use less as it’s more absorbent.
  • Can I cook this recipe in an air fryer? Absolutely! Air fry at 350°F (175°C) for about 10-12 minutes until golden and crispy.

9. Conclusion

These Cheesy Keto Snack Bites are not only easy to make but are a delightful addition to your keto snack repertoire. Their incredible cheese flavor and crispy texture make them irresistible! Don’t hesitate to give them a try and let us know how they turned out. Leave a comment, rate the recipe, or share your cheesy treat on social media—your feedback means the world to us!

Indulge in this cheesy delight, and enjoy every bite without the guilt!

Keto Chicken Strips with Creamy Mushroom Sauce

Keto Chicken Strips with Creamy Mushroom Sauce

Introduction

Have you ever craved comforting, crispy chicken strips, only to feel held back by your low-carb diet? Perhaps you’ve tried to balance your love for delicious food with your commitment to keto,

but it hasn’t always been easy. You might even miss that sense of warmth and satisfaction that traditional comfort foods provide—crispy on the outside, juicy on the inside, smothered generously in a creamy sauce.

Imagine now, enjoying every bite without guilt or worry about breaking your keto plan. That’s precisely why you’ll adore Keto Chicken Strips with Creamy Mushroom Sauce. They bring back the joy of comfort food while perfectly aligning with your keto lifestyle.

In this article, you’ll discover everything you need—from essential ingredients and step-by-step instructions to expert tips and common pitfalls—to confidently create this mouthwatering keto dish at home.

Why You’ll Love These Keto Chicken Strips with Creamy Mushroom Sauce

These keto-friendly chicken strips offer all the indulgence of classic fried chicken without the unwanted carbs. Here’s why they’ll quickly become your favourite:

  • Rich, Satisfying Flavour: Crispy almond-flour crust paired with a luxurious, creamy mushroom sauce.
  • Quick and Easy: Ready in under 30 minutes, perfect for busy weeknights or meal prepping.
  • Nutritionally Balanced: Low-carb, high-protein meal supports your keto goals.
  • Family-Friendly Recipe: Even non-keto eaters will enjoy this delicious dish.

According to recent research, keto-friendly recipes are becoming increasingly popular, highlighting a growing preference for healthy comfort foods (source: Global Ketogenic Diet Market Report, 2023).

Benefits of Incorporating Keto Chicken Strips into Your Diet

These chicken strips aren’t just tasty—they also offer numerous nutritional benefits:

  • Supports Weight Loss: High protein and healthy fats help you feel full, reducing overall calorie intake.
  • Boosts Energy Levels: Low-carb content helps your body stay in ketosis, burning fat efficiently.
  • Builds and Maintains Muscle: Rich protein content helps muscle recovery and growth.
  • Promotes Healthy Digestion: Almond flour provides dietary fibre essential for gut health.

Ingredients Needed for Keto Chicken Strips with Creamy Mushroom Sauce

Here’s a straightforward table to help you prepare:

IngredientQuantityNotes (optional)
Chicken breasts2 largeBoneless, skinless
Almond flour1 cupBlanched
Parmesan cheese½ cupFreshly grated
Eggs2Medium-sized
Garlic powder1 tsp
Salt & black pepperTo tasteFreshly ground
Olive oil2 tbspFor frying
Fresh mushrooms250 gramsSliced thinly
Heavy cream1 cupFull-fat
Butter2 tbspUnsalted
Fresh parsley1 tbspChopped, for garnish

Step-by-Step Instructions for Making Keto Chicken Strips with Creamy Mushroom Sauce

Preparing the Chicken Strips

  1. Slice chicken breasts evenly into strips.
  2. Mix almond flour, Parmesan cheese, garlic powder, salt, and pepper thoroughly in a bowl.
  3. In a separate bowl, beat the eggs until smooth.
  4. Dip chicken strips first in egg, then coat completely in almond flour mixture.

Cooking the Chicken Strips

  1. Warm olive oil in a frying pan over medium-high heat.
  2. Cook chicken strips in batches until golden brown, approximately 4-5 minutes each side.
  3. Place cooked strips on paper towels to absorb extra oil, ensuring they remain crispy.

Preparing the Creamy Mushroom Sauce

  1. In the same frying pan, melt butter gently over medium heat.
  2. Add mushrooms, cooking them until soft and lightly golden (around 4 minutes).
  3. Stir in heavy cream and season lightly with salt and pepper.
  4. Let the sauce simmer gently until it thickens—typically within 3-4 minutes.

Expert Tips to Perfect Your Keto Chicken Strips

  • Dry Your Chicken: Patting the chicken dry ensures a better coating adherence.
  • Use Medium Heat: High heat risks burning your coating; gentle heat achieves crispness evenly.
  • Avoid Crowding: Cooking fewer strips at once helps achieve maximum crispiness.
  • Sauce Consistency: Adjust the sauce thickness by simmering longer or adding extra cream.

Keto-Friendly Side Dishes to Serve with Your Chicken Strips

These sides perfectly complement your keto chicken strips:

  • Cauliflower rice seasoned with garlic and herbs
  • Creamy cauliflower mash
  • Zucchini noodles sautéed lightly with olive oil
  • Oven-roasted asparagus with lemon
  • Fresh garden salad with keto avocado dressing

Nutritional Information for Keto Chicken Strips with Creamy Mushroom Sauce

Here’s the approximate nutritional breakdown per serving:

  • Calories: 450 kcal
  • Protein: 38g
  • Fat: 32g
  • Net Carbs: 5g
  • Fibre: 3g

Note: Accurate nutritional tracking can be facilitated by apps like MyFitnessPal or Cronometer.

Common Mistakes to Avoid When Making Keto Chicken Strips

Steer clear of these common mistakes to ensure perfection:

  • Too Hot Pan: Can quickly burn almond flour coating.
  • Incorrect Measurements: Changes carb and calorie count significantly.
  • Skipping Resting Time: Causes loss of crispiness and excess oil retention.
  • Rushing the Sauce: Patience is key; simmer until thickened properly.

Frequently Asked Questions (FAQ) about Keto Chicken Strips with Creamy Mushroom Sauce

  • Are Keto Chicken Strips with Creamy Mushroom Sauce gluten-free?
    Yes, almond flour makes this dish entirely gluten-free.
  • Can I freeze Keto Chicken Strips with Creamy Mushroom Sauce?
    You can freeze the cooked chicken strips easily. However, it’s recommended to prepare fresh mushroom sauce upon serving for best texture and flavour.
  • How long can I store Keto Chicken Strips with Creamy Mushroom Sauce in the refrigerator?
    Store chicken strips separately from the sauce. Both keep well in airtight containers for up to three days.

Conclusion

Now, you have a keto recipe that doesn’t compromise taste for dietary goals. These crispy Keto Chicken Strips with Creamy Mushroom Sauce offer indulgence without guilt. They’re easy, tasty, and nutritionally balanced, fitting perfectly into your keto meal plan.

Make these keto chicken strips today, and experience the comfort food you’ve missed. Share your delicious creation on social media or in the comments, and help others discover keto-friendly recipes they’ll genuinely enjoy.

Ready to indulge without worry? Try Keto Chicken Strips with Creamy Mushroom Sauce tonight and savour the delicious, guilt-free comfort you’ve been craving!