Your Keto Plan is Ready! Click Here →

Advertisements

Krispy Kreme Chaffles

Krispy Kreme Chaffles

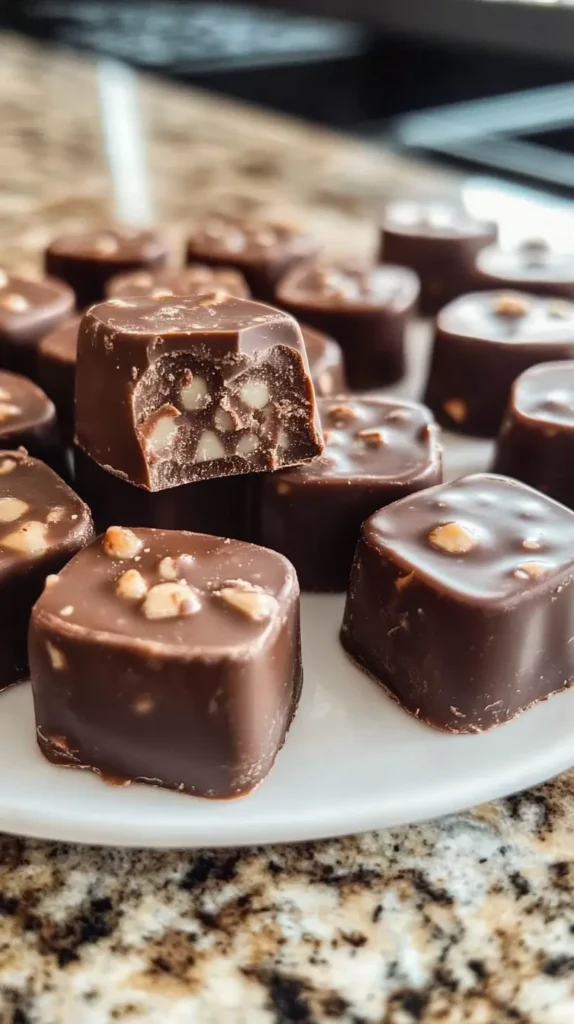
What Are Krispy Kreme Chaffles?

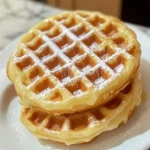
If you’ve been following a low-carb or keto lifestyle, you’ve likely encountered chaffles—crispy, waffle-like creations made with cheese and eggs. But have you ever heard of Krispy Kreme Chaffles? These tasty little treats are a twist on the traditional chaffle, inspired by the popular Krispy Kreme doughnuts. Imagine the sweet,

Krispy Kreme Chaffles

indulgent flavour of a Krispy Kreme doughnut, paired with the crispy, fluffy texture of a chaffle. It’s a match made in keto heaven.

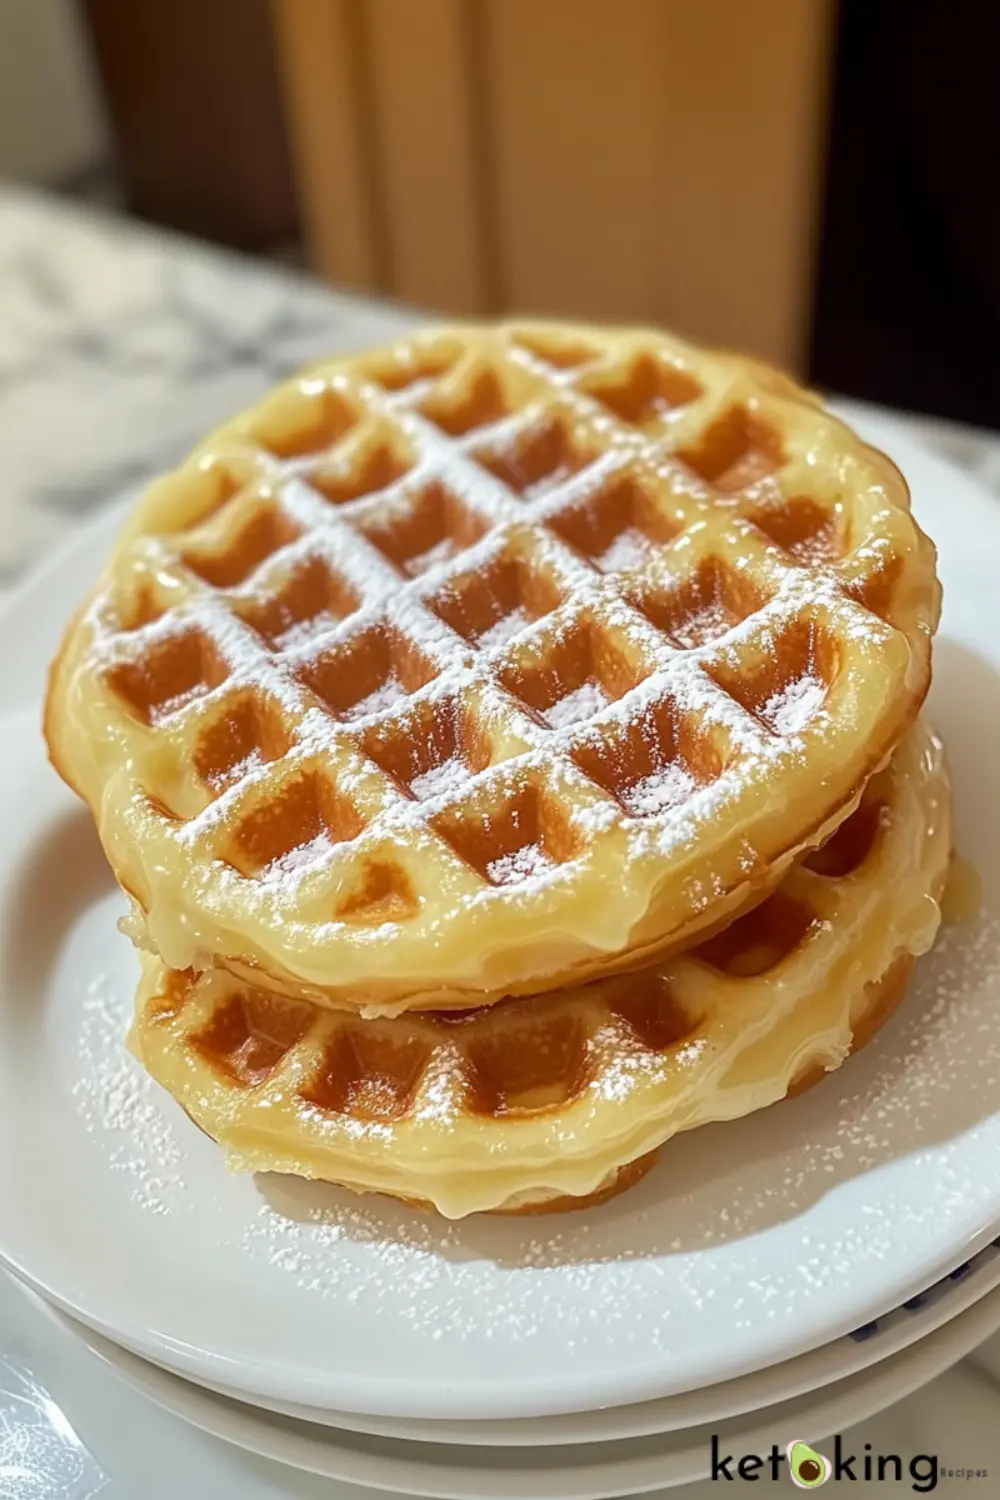
Krispy Kreme chaffles are a delicious low-carb alternative to the sugary, high-carb doughnuts you might be craving. By combining the essence of Krispy Kreme with the base of a chaffle, you can satisfy your sweet tooth while staying on track with your keto or low-carb diet.

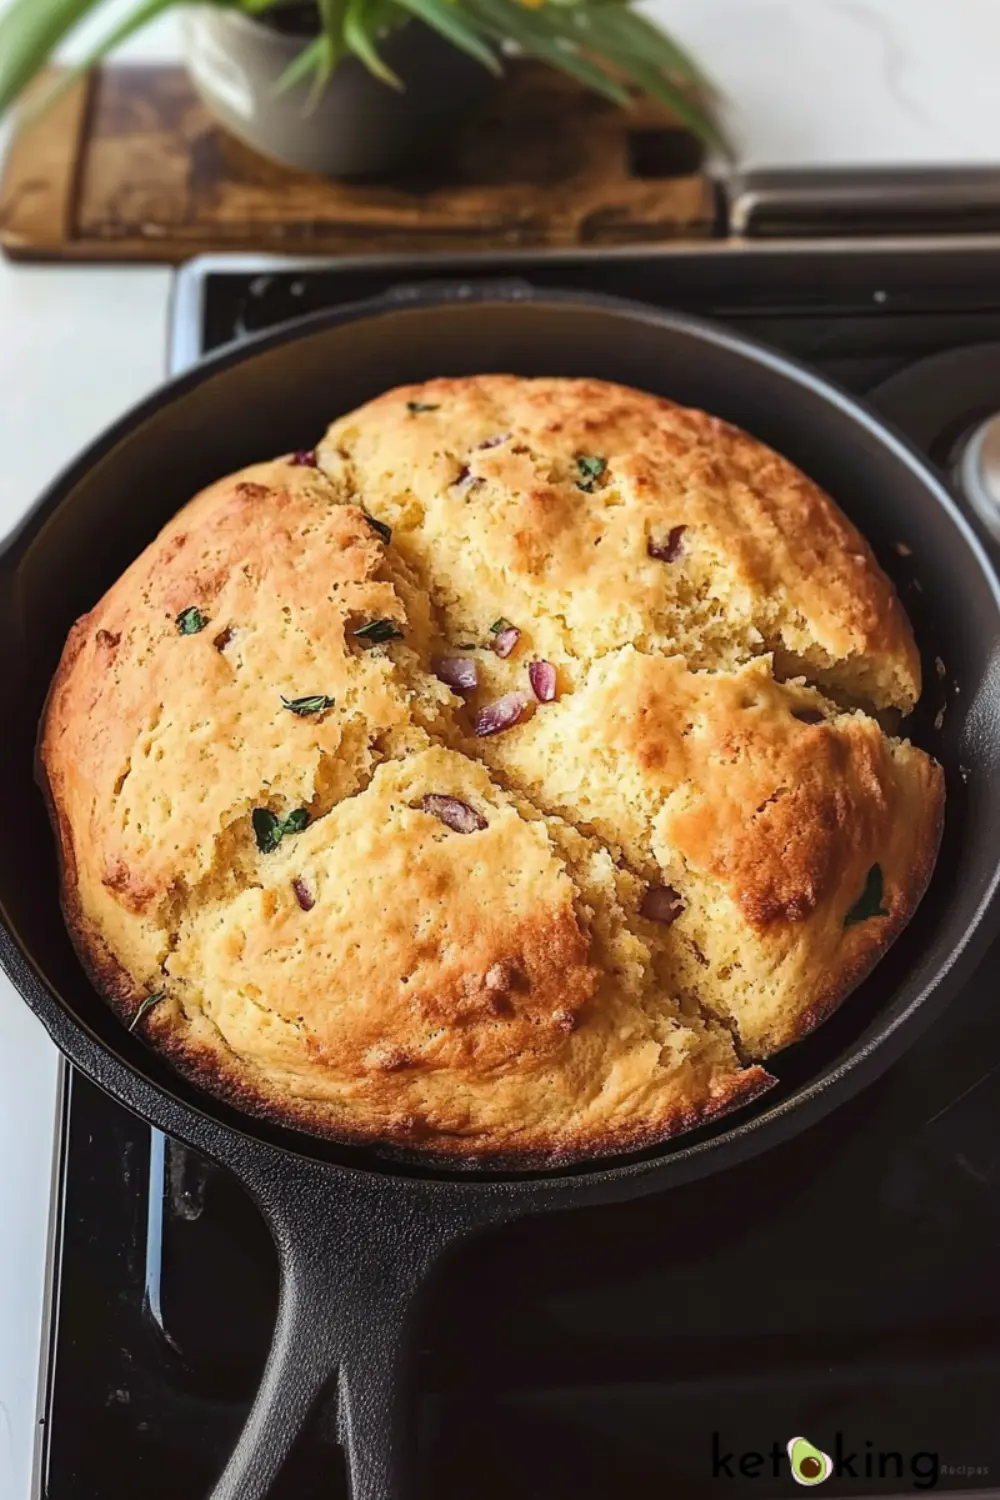
These chaffles are made with simple ingredients like almond flour, eggs, and mozzarella cheese, creating a doughnut-like experience without all the sugar and carbs. They’re perfect for breakfast, a snack, or a low-carb dessert.

The Benefits of Krispy Kreme Chaffles

1. Perfect for Keto and Low-Carb Diets

The main reason Krispy Kreme chaffles are such a great snack option is because they are keto-friendly. Traditional doughnuts are packed with carbs and sugar, but Krispy Kreme chaffles use ingredients that are low in carbs, such as almond flour and mozzarella cheese. This makes them a suitable option for anyone following a ketogenic or low-carb diet.

2. Satisfies Your Sweet Tooth

Craving a sweet, indulgent treat can be a major challenge when you’re on a keto diet. Krispy Kreme chaffles offer a perfect solution. With their doughnut-inspired flavour, they deliver the sweetness you’re missing without spiking your blood sugar or derailing your diet. They’re a great way to satisfy your sweet cravings while sticking to your macros.

3. Low-Carb and High in Protein

With each chaffle, you’re not just enjoying a guilt-free treat, but you’re also getting a good source of protein. Thanks to the eggs and cheese, Krispy Kreme chaffles are packed with protein, helping you stay full and satisfied for longer. Plus, they’re low in carbs, so they won’t kick you out of ketosis.

4. Versatile and Customisable

Krispy Kreme chaffles are incredibly versatile. You can top them with sugar-free syrups, fresh berries, or even whipped cream to make them more indulgent. You can also get creative with the doughnut flavour by experimenting with spices like cinnamon or vanilla. The possibilities are endless!

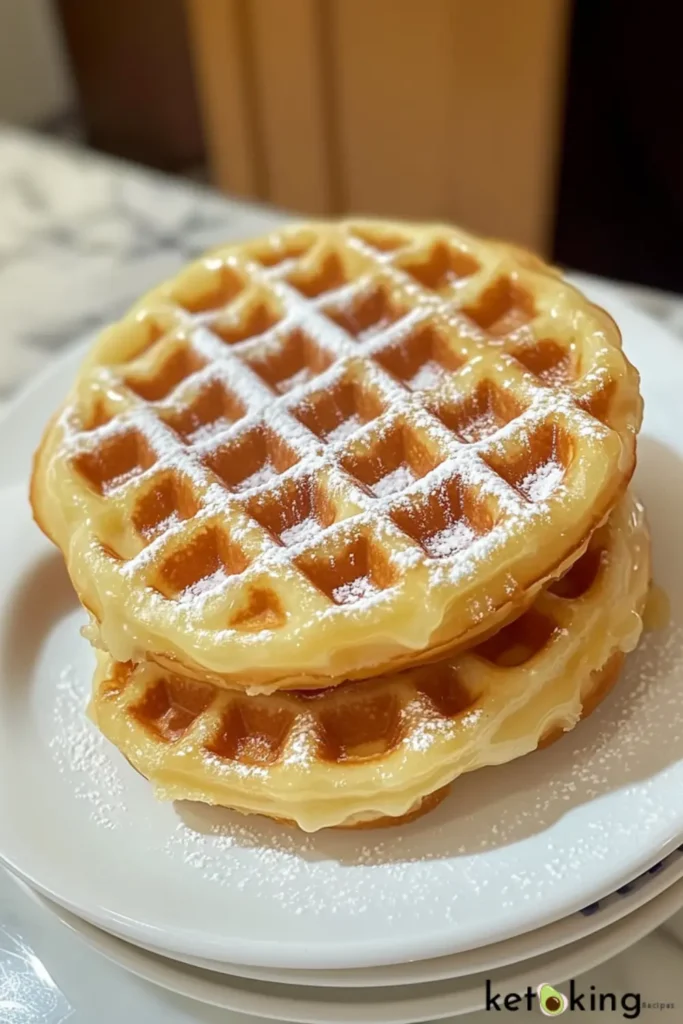
How to Make Your Own Krispy Kreme Chaffles

Making Krispy Kreme chaffles at home is easy, and you can enjoy the same delicious taste as the popular doughnuts, but without the carbs. Here’s a simple recipe to get you started.

Ingredients:

IngredientQuantity
Almond Flour1/4 cup
Mozzarella Cheese1/2 cup
Egg1
Baking Powder1/2 tsp
Vanilla Extract1/2 tsp
Sweetener (like Stevia)1-2 tbsp
Cinnamon (optional)1/2 tsp
Sugar-Free Syrup (optional)To taste
Krispy Kreme Chaffles

Instructions:

  1. Preheat Your Waffle Maker: Start by preheating your waffle maker. If you don’t have a waffle maker, you can also use a mini waffle maker for individual chaffles.
  2. Mix the Ingredients: In a bowl, combine the almond flour, mozzarella cheese, egg, baking powder, vanilla extract, sweetener, and cinnamon (if using). Stir until all the ingredients are well combined.
  3. Cook the Chaffles: Pour the batter into your preheated waffle maker. Cook for about 3-5 minutes or until the chaffle is golden brown and crispy.
  4. Top and Serve: Once your Krispy Kreme chaffles are done, remove them from the waffle maker. You can top them with sugar-free syrup, whipped cream, or a sprinkle of cinnamon for an extra touch of sweetness.
  5. Enjoy!: You now have a delicious Krispy Kreme-inspired treat that’s low-carb, keto-friendly, and perfect for any time of day.

Best Store-Bought Krispy Kreme Chaffle Alternatives

If you’re looking for a quick and convenient way to enjoy Krispy Kreme-inspired chaffles, there are some great store-bought options that are keto-friendly. Here are some of the best brands offering keto chaffle alternatives:

1. ChocZero Keto Chaffles

ChocZero offers a line of keto-friendly chaffles that are perfect for satisfying your sweet tooth. Their chaffles are made with high-quality ingredients and are low in carbs, with only 3 grams of net carbs per serving. They have a rich, sweet flavour that mimics the taste of a doughnut, making them an excellent choice for anyone on a keto diet.

Pros:

  • Low-carb
  • Great flavour profile
  • No artificial ingredients

Cons:

  • Slightly higher price point than homemade chaffles

2. Rebel Keto Chaffles

Rebel is known for creating keto-friendly snacks, and their chaffles are no exception. With a doughnut-like texture and sweet, satisfying flavour, Rebel’s chaffles are a great alternative for anyone craving Krispy Kreme-style treats on a low-carb diet.

Pros:

  • Good texture and flavour
  • Low in carbs and sugar
  • Available in multiple flavours

Cons:

  • Not as customizable as homemade options

Nutritional Breakdown of Krispy Kreme Chaffles

When comparing the nutritional information of homemade Krispy Kreme chaffles with store-bought alternatives, it’s important to consider both the calorie count and the macro breakdown.

NutrientHomemade Krispy Kreme ChafflesStore-Bought (ChocZero)
Calories180160
Fat14g12g
Protein10g8g
Carbs (net)3g3g
Fiber2g2g

The nutritional differences are minor, but homemade chaffles offer slightly more protein, which may help you stay fuller for longer. Store-bought chaffles, on the other hand, can be more convenient and are still low-carb and high in fat, making them a suitable option when you’re in a rush.

How to Enjoy Krispy Kreme Chaffles

Krispy Kreme chaffles aren’t just for breakfast. They’re versatile and can be enjoyed in many different ways. Here are a few ideas for incorporating them into your meals:

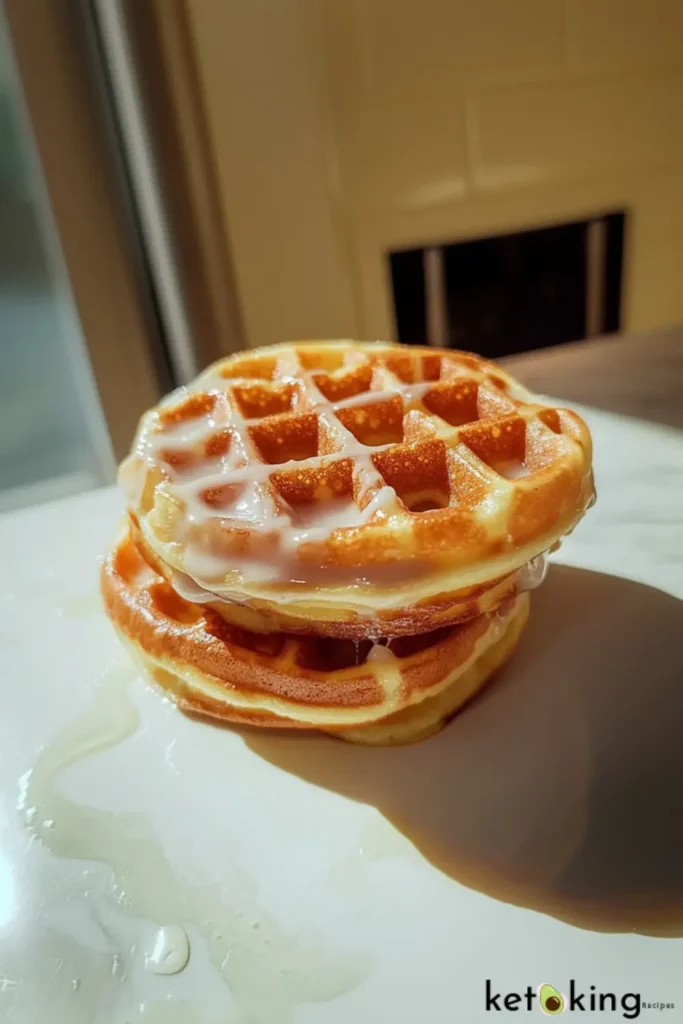
1. Serve with Sugar-Free Syrup

For a classic doughnut experience, top your Krispy Kreme chaffles with sugar-free maple syrup. This sweet addition will give you that authentic doughnut feeling without the extra carbs.

2. Make a Keto Chaffle Sandwich

You can also use Krispy Kreme chaffles as a base for a low-carb sandwich. Layer them with keto-friendly fillings like bacon, eggs, avocado, or even turkey for a savoury spin on the traditional sweet chaffle.

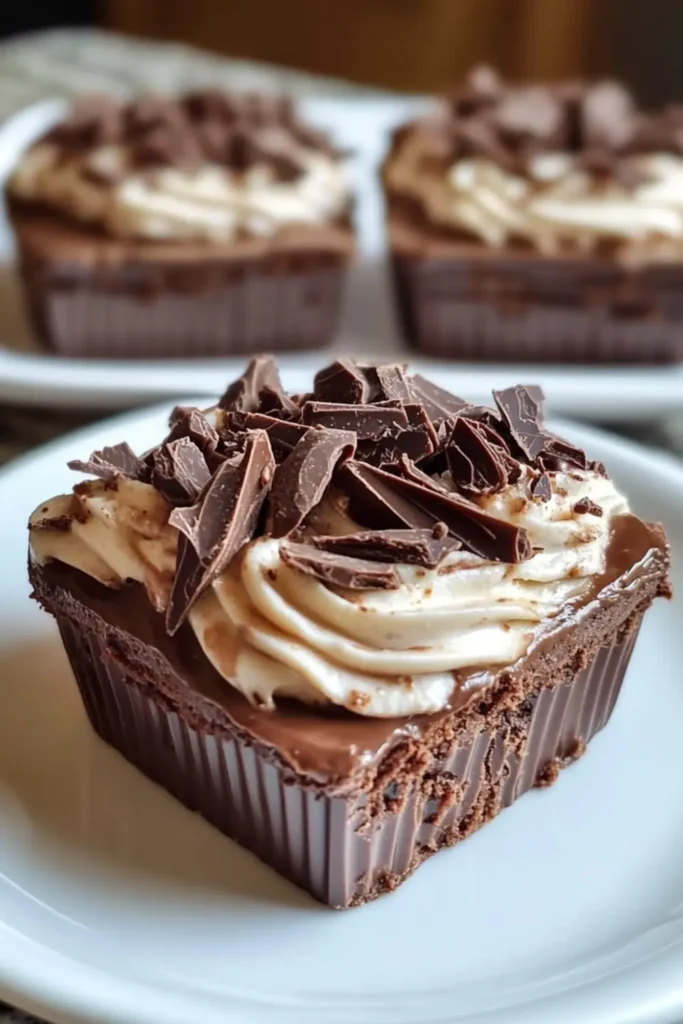
3. Use as a Dessert Base

For a keto-friendly dessert, you can top your chaffles with whipped cream, fresh berries, or a drizzle of sugar-free chocolate syrup. This is a great option if you want to enjoy a sweet treat without compromising your diet.

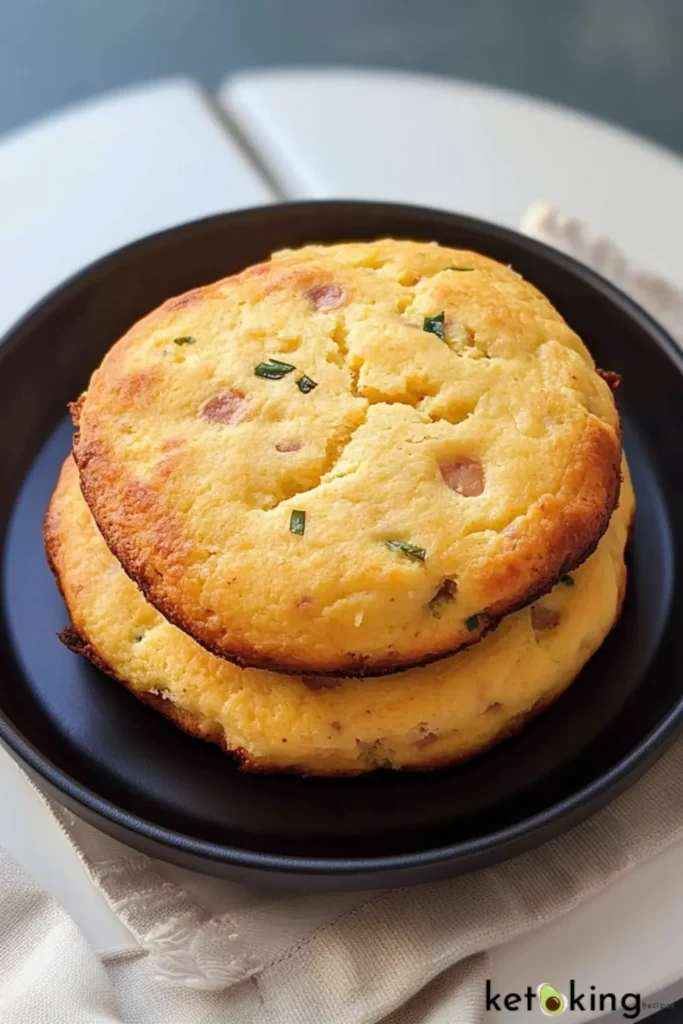
4. Create a Keto Chaffle Cake

Stack a few Krispy Kreme chaffles on top of each other, layering them with whipped cream and sugar-free frosting to make a keto-friendly chaffle cake. It’s perfect for birthdays, special occasions, or just when you want something indulgent.


Common Mistakes to Avoid When Making Krispy Kreme Chaffles

When making your own Krispy Kreme chaffles, there are a few common mistakes that can affect the final product. Here’s what to avoid:

  • Using Too Much Almond Flour: Too much almond flour can make your chaffles dense and heavy. Stick to the measurements in the recipe to get the right texture.
  • Overcooking: Overcooking your chaffles can result in a dry, tough texture. Keep an eye on the cooking time and remove them from the waffle maker once they’re golden brown and crispy.
  • Not Preheating the Waffle Maker: Make sure your waffle maker is fully preheated before you add the batter. This ensures that the chaffles cook evenly and have the perfect crispness.
  • Using the Wrong Cheese: Mozzarella is ideal for chaffles because it melts perfectly and creates a fluffy texture. Avoid using cheeses that don’t melt well, like cheddar, as they can affect the final result.

Krispy Kreme Chaffles FAQs

Q: How many carbs are in Krispy Kreme chaffles?

Krispy Kreme chaffles typically contain 3 grams of net carbs per serving, making them a perfect low-carb treat for those on a keto diet.

Q: Can I make Krispy Kreme chaffles with coconut flour instead of almond flour?

Yes, you can use coconut flour as a substitute, but you’ll need to adjust the liquid content, as coconut flour absorbs more moisture than almond flour.

Q: Are Krispy Kreme chaffles gluten-free?

Yes, if you use almond flour and avoid any wheat-based ingredients, Krispy Kreme chaffles are naturally gluten-free.

Q: Can I eat Krispy Kreme chaffles on a low-carb diet?

Absolutely! Krispy Kreme chaffles are a great way to enjoy a doughnut-inspired treat while sticking to your low-carb or keto diet.


Conclusion: Enjoying Krispy Kreme Chaffles Guilt-Free

Whether you’re following a keto diet or simply looking for a healthier way to enjoy the taste of Krispy Kreme doughnuts, Krispy Kreme chaffles are the perfect solution. They’re low-carb, high in protein, and versatile enough to be enjoyed in a variety of ways.

Ready to indulge in a keto-friendly doughnut experience? Give Krispy Kreme chaffles a try, and enjoy a guilt-free treat that satisfies your sweet tooth.

Call to Action: If you loved this guide, why not try making your own Krispy Kreme chaffles today? Share your creative toppings or favourite ways to enjoy them in the comments below! We’d love to see how you’re making these delicious chaffles your own!

Keto Cornbread Recipe: Enjoy Delicious Comfort Without the Carbs!

Keto Cornbread

Introduction

If you’re like me, you might find yourself longing for classic comfort foods while sticking to your keto lifestyle. One dish I’ve missed dearly is traditional cornbread, which always reminds me of warm family gatherings and cosy evenings.

Keto Cornbread

Fortunately, keto cornbread has allowed me to enjoy those nostalgic flavours without sacrificing my dietary goals. This article will guide you through the ins and outs of keto cornbread, ensuring you never have to miss out again!

What is Keto Cornbread?

Keto cornbread is a low-carb, grain-free version of traditional cornbread, specifically designed to fit perfectly within a ketogenic diet. Unlike traditional cornbread, which contains high-carb ingredients like cornmeal, keto cornbread substitutes these with nutrient-dense, low-carb alternatives such as almond flour and coconut flour.

FeatureTraditional CornbreadKeto Cornbread
Main IngredientsCornmeal, flour, sugarAlmond flour, coconut flour, sweeteners
Carb ContentHighVery Low
Keto-FriendlyNoYes

Benefits of Keto Cornbread

Keto cornbread doesn’t just taste great; it also comes with numerous health benefits, such as:

  • Low in Carbs and Sugar: Helps maintain ketosis by minimizing carb intake.
  • High in Healthy Fats and Fibre: Supports digestion and keeps you feeling full longer.
  • Ideal for Weight Management: Assists in managing cravings and promotes sustained energy.
  • Diabetic-Friendly: Safe for those managing blood sugar levels.

Key Ingredients for Keto Cornbread

Essential Ingredients

  • Almond Flour
  • Coconut Flour
  • Eggs
  • Baking Powder
  • Butter or Coconut Oil
  • Keto-friendly Sweetener (like Erythritol or Monk Fruit)

Optional Ingredients

  • Cheese (for added flavour)
  • Jalapenos (for spice)
  • Fresh Herbs (such as rosemary or chives)

Ingredients Table:

IngredientAmount
Almond Flour1 cup
Coconut Flour1/4 cup
Eggs3 large
Baking Powder1 tbsp
Melted Butter/Coconut Oil1/4 cup
Keto Sweetener2 tbsp

Step-by-Step Keto Cornbread Recipe

Follow these simple steps for perfect keto cornbread every time:

  1. Preheat your oven to 180°C (350°F) and grease a baking dish.
  2. Combine almond flour, coconut flour, baking powder, and sweetener in one bowl.
  3. In another bowl, whisk eggs with melted butter or coconut oil until smooth.
  4. Mix wet and dry ingredients together until a smooth batter forms.
  5. Pour the batter into the prepared baking dish.
  6. Bake for 20-25 minutes until golden brown.
  7. Cool slightly before slicing and serving.

Tips for Perfect Keto Cornbread

  • Use a precise blend of almond and coconut flours to achieve the perfect texture.
  • Add more moisture (extra butter or eggs) if the batter seems too dry.
  • Check for doneness by inserting a toothpick—it’s ready when it comes out clean.
  • Store leftovers in an airtight container to maintain freshness.

Delicious Ways to Enjoy Keto Cornbread

  • Pair keto cornbread with soups, stews, or salads.
  • Use slices for keto-friendly sandwiches or toast for breakfast.
  • Enjoy it as a satisfying snack with your favourite keto spread or butter.

Common Mistakes When Making Keto Cornbread

  • Overmixing Batter: Leads to a dense, tough texture.
  • Incorrect Oven Temperature: Too hot or too cool temperatures result in uneven baking.
  • Inaccurate Measuring: Incorrect flour-to-liquid ratios affect the texture and moisture.

FAQ about Keto Cornbread

What makes keto cornbread different from traditional cornbread?

  • Keto cornbread replaces cornmeal with low-carb ingredients like almond flour, reducing carbs significantly.

Can I store keto cornbread in the freezer?

  • Yes! Store slices wrapped individually and thaw at room temperature or reheat in the oven.

Is keto cornbread gluten-free?

  • Absolutely! Most keto cornbread recipes, including this one, are naturally gluten-free.

Conclusion

Keto cornbread offers the comfort of your favourite traditional dish without compromising your health goals. By following this easy, delicious recipe, you can enjoy the taste you love and keep your keto diet on track. Go ahead, give it a try today, and rediscover the joy of guilt-free comfort food!

Keto Chocolate Delight

Keto Chocolate Delight

Indulging in a rich, chocolaty dessert while maintaining a keto lifestyle can seem like a distant dream. However, let me take you on a delicious journey with my Keto Chocolate Delight, a recipe that not only satisfies your sweet tooth but also keeps you aligned with low-carb dietary goals.

Keto Chocolate Delight

This treat embodies the essence of chocolatey goodness—smooth, velvety, and decadently tempered by the nuttiness of almond flour.

What makes this recipe special? It’s not just about the simple ingredients or the ease of preparation; it’s about the joy it brings to your family gatherings, quiet evenings, or even a meal prep moment. The flavor profile combines sweet, bitter cocoa with a hint of vanilla—creating a medley sure to cast a spell on any chocolate lover.

Why Make This Recipe?

Here are a few compelling reasons why you need to try this Keto Chocolate Delight:

  • Easy and Quick to Make: With minimal preparation time and simple steps, you’ll have a dish ready to satisfy your cravings in no time.
  • Budget-Friendly: The ingredients are readily available and won’t break the bank, making it perfect for any home baker.
  • Family Favorite: This delightful dessert is sure to impress not just those on a keto diet but anyone who loves chocolate.
  • Healthy or Diet-Friendly: With low-carb ingredients and no sugar added, you can enjoy dessert without the guilt.

How to Make Keto Chocolate Delight

Ingredients

Keto Chocolate Delight

Keto Chocolate Delight

Alice
This Keto Chocolate Delight is a rich, creamy, and indulgent dessert that satisfies your chocolate cravings without the guilt! Made with low-carb ingredients, it’s perfect for a quick treat while staying on track with your keto goals.
Prep Time 10 minutes
Total Time 10 minutes
Course Dessert
Cuisine Keto, Low-Carb
Servings 4 servings
Calories 210 kcal

Ingredients
  

  • 1 cup heavy cream
  • ¼ cup unsweetened cocoa powder
  • ¼ cup powdered erythritol or preferred keto sweetener
  • 1 teaspoon vanilla extract
  • ¼ teaspoon salt
  • 2 ounces sugar-free dark chocolate melted
  •  
  • 1 tablespoon unsalted butter optional for extra richness

Instructions
 

  • Step 1: Whip the Cream
  • In a mixing bowl, use a hand mixer to whip the heavy cream until soft peaks form.
  • Step 2: Mix the Chocolate2. In a separate bowl, whisk together the unsweetened cocoa powder, powdered erythritol, vanilla extract, and salt.3. Gently fold the dry ingredients into the whipped cream, stirring slowly to avoid deflating the mixture.
  • Step 3: Add Melted Chocolate4. Melt the sugar-free dark chocolate and stir in the butter for extra richness.5. Gently fold the melted chocolate into the cream mixture until smooth and fluffy.
  • Step 4: Chill and Serve6. Spoon the mixture into serving bowls and refrigerate for at least 30 minutes before serving.7. Enjoy as is or top with whipped cream and cocoa nibs for extra flavor!

Notes

  • Make it dairy-free by using coconut cream instead of heavy cream.
  • Add a pinch of espresso powder to enhance the chocolate flavor.
 
  • Store in an airtight container in the fridge for up to 3 days.

Directions

  1. Preheat your oven to 350°F (175°C).
  2. In a mixing bowl, combine the almond flour, cocoa powder, sweetener, baking powder, and a pinch of salt.
  3. In a separate bowl, whisk together the eggs, melted butter, and vanilla extract until well combined.
  4. Gently fold the wet ingredients into the dry mixture, stirring until you have a smooth batter.
  5. Pour the batter into a greased baking dish, spreading it evenly.
  6. Bake in the preheated oven for 20-25 minutes, or until a toothpick inserted comes out clean.
  7. Allow it to cool before cutting into squares. Enjoy your delicious Keto Chocolate Delight!

How to Serve Keto Chocolate Delight

Here are a few ideas to elevate your serving experience:

  • Pair with Whipped Cream: A dollop of keto-friendly whipped cream can enhance the richness.
  • Serving with Berries: Fresh raspberries or strawberries add a refreshing burst that complements the chocolate flavor.
  • Coffee or Tea: Enjoy it alongside a cup of coffee or herbal tea for a delightful afternoon treat.

How to Store Keto Chocolate Delight

To keep your Keto Chocolate Delight fresh:

  • Refrigeration: Store it in an airtight container in the refrigerator for up to a week.
  • Freezing: It can be frozen for up to three months; just ensure it’s wrapped properly to avoid freezer burn.
  • Reheating: When you’re ready to enjoy it, thaw in the fridge overnight and then reheat in the microwave for a few seconds.

Tips to Make Keto Chocolate Delight Perfectly

  1. Enhance Flavor: Add a pinch of espresso powder to the batter for an intensified chocolate taste.
  2. Avoid Common Mistakes: Do not overmix the batter; this could lead to a denser texture.
  3. Cooking Techniques: Try using glass baking dishes for even baking.
  4. Texture Tip: Let it cool completely for the best texture when cutting into squares.

Variations

Feel free to customize your Keto Chocolate Delight:

  • Vegan Version: Substitute eggs with flaxseed meal or apple sauce, and use coconut oil instead of butter.
  • Gluten-Free Modification: As the recipe is already gluten-free, keep using almond flour or experiment with a gluten-free blend.
  • Low-Carb Twist: Incorporate sugar-free chocolate chips for extra texture.

Frequently Asked Questions (FAQ)

Can I make Keto Chocolate Delight ahead of time?
Absolutely! This dessert can be made a day in advance and stored properly to preserve its freshness.

What are the best substitutes for almond flour?
Coconut flour can be used but in a lesser quantity since it absorbs more moisture. Adjust other ingredients accordingly.

Can I cook this recipe in an air fryer?
Yes, you can! Use your air fryer at 325°F (160°C) and cook for about 15-20 minutes, checking for doneness.

Conclusion

Keto Chocolate Delight is a delectable dessert that allows you to indulge without compromising your dietary goals. With its rich flavors and easy preparation, it’s a must-try for anyone who loves chocolate. Don’t hesitate to share your experience with this recipe! Leave a comment, rate it, or share your delicious results on social media. Happy baking!

Keto Lemon Pie

Keto Lemon Pie

Introduction

If you’re on a keto diet and miss the joy of indulging in a delicious dessert, then this Keto Lemon Pie is about to become your new favorite!

Keto Lemon Pie

I remember a time when I thought going low-carb meant sacrificing delightful treats, but this pie proves otherwise. With its zesty lemon flavor and creamy texture, it offers a refreshing twist to your dessert table without derailing your diet.

Picture biting into a slice of this pie: the tangy lemon filling perfectly balances the sweet crust, creating a mouthwatering experience that is not only satisfying but guilt-free. It’s a dessert that transcends dietary restrictions and is sure to impress everyone around the table.

2. Why Make This Recipe?

Here are a few compelling reasons why you should add this Keto Lemon Pie to your recipe repertoire:

  • Easy and Quick to Make: With just a few simple ingredients and steps, you can whip up this pie in no time!
  • Budget-Friendly: Utilizing accessible ingredients, this recipe won’t break the bank.
  • Family Favorite: Surprisingly, even those not following a keto diet will love this unique pie, making it perfect for family gatherings.
  • Healthy and Diet-Friendly: This dish incorporates low-carb ingredients, making it a guilt-free treat.
Keto Lemon Pie

3. How to Make Keto Lemon Pie

Ingredients

Keto Lemon Pie

Keto Lemon Pie

Alice
This Keto Lemon Pie is a creamy, tangy, and sugar-free dessert that satisfies your sweet tooth while keeping carbs low. Made with a buttery almond flour crust and a silky lemon filling, it’s the perfect guilt-free treat for anyone on a keto diet.
Prep Time 15 minutes
Cook Time 12 minutes
Total Time 27 minutes
Course Dessert
Cuisine Keto, Low-Carb
Servings 8 servings
Calories 180 kcal

Ingredients
  

For the Crust:

  • 1 ½ cups almond flour
  • ¼ cup melted butter
  • 2 tablespoons powdered erythritol
  • ½ teaspoon vanilla extract

For the Lemon Filling:

  •  
  • 3 large eggs
  • ½ cup fresh lemon juice
  • ½ cup powdered erythritol
  • 1 teaspoon lemon zest
  • ¼ cup heavy cream
  • 1 teaspoon vanilla extract
  • ¼ teaspoon sea salt

Instructions
 

  • Step 1: Prepare the Crust
  • Preheat oven to 350°F (175°C).
  • In a bowl, mix almond flour, melted butter, powdered erythritol, and vanilla extract until a dough forms.
  • Press the dough evenly into a greased 9-inch pie pan.
  • Bake for 10-12 minutes, until golden brown. Let it cool.
  • Step 2: Make the Lemon Filling5. In a medium saucepan over low heat, whisk together eggs, lemon juice, erythritol, lemon zest, heavy cream, vanilla extract, and sea salt.6. Stir constantly for 5-7 minutes until the mixture thickens.7. Remove from heat and pour the lemon filling into the cooled crust.
  •  
  • Step 3: Chill and Serve8. Let the pie cool at room temperature for 15 minutes, then refrigerate for at least 2 hours to set.9. Slice and enjoy! Optionally, serve with whipped cream and fresh berries.

Notes

  • Make it dairy-free by replacing heavy cream with full-fat coconut cream.
  • For extra lemon flavor, add an additional teaspoon of lemon zest.
 
  • Store in the fridge for up to 5 days or freeze for up to 2 months.

Directions

  1. Preheat your oven to 350°F (175°C).
  2. In a mixing bowl, combine the crushed pecans, melted butter, and 3 tablespoons of erythritol. Mix well, then press the mixture into the bottom of a pie pan to form your crust.
  3. Bake the crust for about 10 minutes, or until it’s beautifully golden brown.
  4. While the crust is baking, whisk together the lemon juice, heavy cream, eggs, 1/2 cup of erythritol, and vanilla extract in another bowl until the mixture is smooth and well combined.
  5. Once your crust is ready, carefully pour the zesty lemon filling into it.
  6. Return the pie to the oven and bake for another 20-25 minutes, or until the filling has set nicely.
  7. Let the pie cool for a bit, then transfer it to the refrigerator for a few hours before serving. Trust me, this will make it even more delicious!

4. How to Serve Keto Lemon Pie

  • Serve with a dollop of whipped cream on top for added creaminess.
  • Pair it with a nice cup of herbal tea or coffee for a delightful afternoon treat.
  • Consider garnishing with lemon zest or mint leaves for a pop of color and flavor.

5. How to Store Keto Lemon Pie

To keep your Keto Lemon Pie fresh:

  • Refrigeration: Store any leftovers in an airtight container in the refrigerator. It should stay fresh for up to 5 days.
  • Freezing: If you want to prepare it ahead of time, you can freeze the pie. Wrap it tightly in foil or plastic wrap. It can be frozen for up to 2 months.
  • Reheating: Thaw it in the refrigerator overnight before serving. You can enjoy it cold or bring it to room temperature.

6. Tips to Make Keto Lemon Pie Perfectly

  • Enhance the Flavor: Add a pinch of salt to the filling to balance out the sweetness.
  • Avoid Common Mistakes: Make sure your eggs are at room temperature for better incorporation.
  • Cooking Techniques: For the best texture, avoid over-mixing the filling—mix just until combined.
  • Experiment with Sweeteners: Try different sugar substitutes to find what works best for your palate.

7. Variations (If Any)

  • Vegan Version: Substitute eggs with flaxseed meal mixed with water or a plant-based egg replacer.
  • Gluten-Free Adaptation: Ensure your chosen sweetener and other components are certified gluten-free.
  • Low-Carb Modifications: Use almond flour instead of crushed pecans for the crust if you’re looking for a different flavor profile.

8. Frequently Asked Questions (FAQ)

  1. Can I make Keto Lemon Pie ahead of time? Absolutely! This pie is perfect for making in advance. Just store it in the refrigerator to keep it fresh.
  2. What are the best substitutes for erythritol? You can use stevia or monk fruit as alternatives, adjusting the quantity based on your sweetness preference.
  3. Can I cook this recipe in an air fryer? Yes, you can! Adjust the temperature and time accordingly, usually around 320°F (160°C) for 15-20 minutes.

9. Conclusion

In summary, this Keto Lemon Pie is not just a treat; it’s a delightful blend of flavor and texture that feels indulgent while being keto-friendly. Whether you’re serving it for a celebration or just enjoying a slice by yourself, it’s sure to satisfy your sweet tooth without the guilt.

Try this recipe today, and let us know how it turns out! Leave a comment below, rate the recipe, or share your creation on social media. Happy baking!

Keto Cloud Cake

Keto Cloud Cake

1. Introduction

If you’re on a keto journey and have a sweet tooth, Keto Cloud Cake is about to become your new favorite dessert. Imagine a light, fluffy cake that melts in your mouth,

Keto Cloud Cake

reminiscent of a sweet embrace from a loved one. This recipe is not just any cake; it embodies the freedom of enjoying dessert without the guilt or the carbs. With its creamy texture and subtle sweetness, it’s a delightful treat that makes every bite feel special.

What sets this cake apart is its airy texture, achieved through the careful folding of whipped egg whites into a creamy batter, creating a cloud-like experience with every slice. Perfect for any occasion, this dessert is sure to impress friends and family alike!

2. Why Make This Recipe?

Here are three compelling reasons to try Keto Cloud Cake:

  • Easy and Quick to Make: This recipe comes together in less than an hour, making it a simple choice for any time you need a sweet fix.
  • Budget-Friendly: The ingredients are straightforward and often found in your kitchen, eliminating excessive grocery costs.
  • Healthy or Diet-Friendly: With low carbs and high protein, this dessert fits perfectly into your keto diet plan while satisfying your cravings.

3. How to Make Keto Cloud Cake

Keto Cloud Cake

Ingredients

IngredientQuantity
Egg whites4 large
Cream of tartar½ tsp
Powdered keto sweetener½ cup (100 g)
Vanilla extract1 tsp
Almond flour½ cup (50 g)
Coconut flour2 tbsp (15 g)
Baking powder1 tsp
SaltPinch
Heavy whipping cream1 cup (240 ml)
Fresh berries (optional)For garnish

Instructions:

  1. Prepare: Preheat oven to 160°C (325°F). Line an 8-inch round cake pan with parchment paper.
  2. Whip Egg Whites: In a clean bowl, whip egg whites and cream of tartar using an electric mixer until soft peaks form. Gradually add sweetener and vanilla, whipping until stiff peaks form (cloud-like consistency).
  3. Combine Dry Ingredients: In a separate bowl, whisk almond flour, coconut flour, baking powder, and salt.
  4. Fold Gently: Gently fold the dry mixture into whipped egg whites in batches, being careful not to deflate the mixture.
  5. Bake: Spread batter gently into prepared cake pan. Bake for 25-30 mins, until lightly golden and springy.
  6. Cool & Decorate: Allow cake to cool completely. Whip heavy cream until thickened, spread generously on top. Garnish with fresh berries.

Prepare: Preheat oven to 160°C (325°F). Line an 8-inch round cake pan with parchment paper.

Whip Egg Whites: In a clean bowl, whip egg whites and cream of tartar using an electric mixer until soft peaks form. Gradually add sweetener and vanilla, whipping until stiff peaks form (cloud-like consistency).

Combine Dry Ingredients: In a separate bowl, whisk almond flour, coconut flour, baking powder, and salt.

Fold Gently: Gently fold the dry mixture into whipped egg whites in batches, being careful not to deflate the mixture.

Bake: Spread batter gently into prepared cake pan. Bake for 25-30 mins, until lightly golden and springy.

4. How to Serve Keto Cloud Cake

  • Serve with Fresh Berries: Top your slice with fresh strawberries or blueberries for added flavor and a pop of color.
  • Pair with Whipped Cream: A dollop of sugar-free whipped cream can elevate this dessert to new heights.
  • Garnish with a Drizzle of Keto Chocolate Sauce: For chocolate lovers, a light drizzle will add an indulgent touch.

5. How to Store Keto Cloud Cake

To ensure your Keto Cloud Cake stays fresh:

  • Refrigerate: Store any leftovers in an airtight container in the fridge for up to 5 days.
  • Freeze: For longer storage, wrap individual slices in plastic wrap and place them in a freezer-safe bag. It can last up to 2 months in the freezer.
  • Reheat: To enjoy warm cake, simply microwave for 10-15 seconds, keeping it moist and delicious.

6. Tips to Make Keto Cloud Cake Perfectly

  • Enhance Flavor: Feel free to add a pinch of lemon zest or almond extract for a unique twist.
  • Common Mistakes: Avoid overmixing when folding in the egg whites to keep the cake light and fluffy.
  • Cooking Techniques: Letting the cream cheese soften at room temperature will help in blending it smoothly with the other ingredients.
  • Check Doneness: A toothpick inserted into the center should come out clean to ensure it’s baked thoroughly.

7. Variations

  • Vegan Version: Substitute eggs with flax eggs (1 tablespoon flaxseed meal + 2.5 tablespoons water for each egg).
  • Gluten-Free Adaptation: Ensure all ingredients used are certified gluten-free.
  • Add Flavor Variations: Consider adding cocoa powder for a chocolate version, or spices like cinnamon for an added zing.

8. Frequently Asked Questions (FAQ)

Can I make Keto Cloud Cake ahead of time?
Yes, you can prepare this cake a day in advance. Store it in the fridge to keep it fresh.

What are the best substitutes for erythritol?
You can use stevia, monk fruit sweetener, or any other keto-friendly sweeteners as substitutes.

Can I cook this recipe in an air fryer?
Yes, you can adjust the temperature to around 270°F (130°C) and check for doneness sooner, usually around 20-25 minutes.

9. Conclusion

Keto Cloud Cake is not just a recipe; it’s a delightful experience that resonates with anyone looking for a sweet yet guilt-free treat. With its fluffy texture and creamy flavor, it’s sure to impress your guests while keeping you aligned with your dietary goals. So, why not give this recipe a try? You might just find your new favorite dessert!

If you enjoy making this cake or have your twists to share, leave a comment below, rate the recipe, or snap a picture and share it on social media!

Chocolate Keto Fat Bombs

Chocolate Keto Fat Bombs

Are you craving something deliciously sweet but also want to stick to your keto diet? Let me share my experience with Chocolate Keto Fat Bombs, a treat that hits all the marks!

Chocolate Keto Fat Bombs

I remember the first time I made them; they were an instant hit in my household, bringing smiles to faces and satisfying sweet cravings without the guilt. These bites are rich, creamy, and provide a perfect balance of healthy fats that keep you feeling satiated.

Why Make This Recipe?

There are countless reasons to whip up a batch of these delightful fat bombs. Here are just a few:

  • Easy and Quick to Make: With no baking required, you can have these ready in no time!
  • Budget-Friendly: The ingredients are simple and accessible, making this an easy addition to your grocery list.
  • Family Favorite: They’re not just for keto enthusiasts; everyone will love them.
  • Healthy and Diet-Friendly: Packed with good fats and nutrients without the carbs!

How to Make Chocolate Keto Fat Bombs

Ingredients

Chocolate Keto Fat Bombs

Chocolate Keto Fat Bombs

Alice
Chocolate Keto Fat Bombs are the perfect low-carb, high-fat snack to keep you energized and curb cravings. These rich, creamy, and chocolatey bites are made with simple ingredients and provide a delicious treat while staying keto-friendly. They are great for meal prep and can be stored for a quick snack whenever needed.
Prep Time 10 minutes
Total Time 10 minutes
Servings 12 fat bombs
Calories 140 kcal

Ingredients
  

  • ½ cup coconut oil
  • ½ cup almond butter or peanut butter
  • ¼ cup unsweetened cocoa powder
  • 2 tablespoons powdered erythritol or preferred keto sweetener
  • 1 teaspoon vanilla extract
  • ¼ teaspoon sea salt
  • 2 tablespoons unsweetened shredded coconut optional
  • 2 tablespoons chopped nuts optional
  •  

Instructions
 

  • In a microwave-safe bowl, melt the coconut oil and almond butter together in 20-second intervals, stirring in between, until fully combined. Alternatively, use a stovetop on low heat.
  • Stir in the cocoa powder, erythritol, vanilla extract, and sea salt until smooth.
  • Pour the mixture into silicone molds or a lined mini muffin tray for easy removal.
  • Optionally, sprinkle shredded coconut or chopped nuts on top for added crunch.
  • Place the molds in the freezer for 30-60 minutes until the fat bombs are solid.
  • Once set, pop them out of the molds and store them in an airtight container in the fridge or freezer.

Notes

  • For a nut-free version, replace almond butter with sunflower seed butter.
  • If you prefer a sweeter taste, add more erythritol or stevia drops.
  • Store in the fridge for up to 2 weeks or in the freezer for up to 3 months.
  • Let them sit at room temperature for a few minutes before eating if stored in the freezer.

Substitutions: You can use almond butter instead of peanut butter, or replace walnuts with pecans for a different flavor.

Chocolate Keto Fat Bombs

Directions

  1. In a mixing bowl, combine the peanut butter, chopped walnuts, shredded coconut, coconut oil, and cocoa powder.
  2. Add your choice of sweetener to taste and mix everything together until smooth and creamy.
  3. Pour the luscious mixture into silicone molds and pop them in the fridge for about 1-2 hours, or until they’re nice and firm.
  4. Once set, carefully pop the fat bombs out of the molds and store them in an airtight container in the fridge for those moments when you crave something sweet!

How to Serve Chocolate Keto Fat Bombs

These fat bombs are wonderfully versatile. Here are a few serving suggestions:

  • Enjoy them as a post-workout snack to refuel on healthy fats.
  • Pair them with a cup of herbal tea or coffee for a delightful afternoon treat.
  • Serve them alongside fresh berries for a touch of freshness and added nutrients.

How to Store Chocolate Keto Fat Bombs

To keep your fat bombs fresh:

  • Store them in an airtight container in the fridge for up to 2 weeks.
  • If you want to make a larger batch, they freeze well! Just place them in a freezer-safe container, and they should last for about 3 months.
  • To reheat, simply let them sit at room temperature for a few minutes, or you can microwave them for a few seconds on low power if they become too firm.

Tips to Make Chocolate Keto Fat Bombs Perfectly

Here are some expert tips to enhance your fat bombs:

  1. Flavor Enhancement: Add a dash of vanilla extract or a pinch of sea salt for deeper flavors.
  2. Avoid Common Mistakes: Make sure your ingredients are well-mixed; otherwise, the texture will be off.
  3. Cooking Techniques: Ensure you let them set properly in the fridge to achieve the perfect firmness.
  4. Experiment with Add-ins: Consider incorporating chia seeds, hemp hearts, or a touch of peppermint extract for variations.

Variations

Feel free to customize these fat bombs:

  • Vegan Version: Use almond butter and replace honey with a vegan sweetener.
  • Gluten-Free: The current recipe is naturally gluten-free as it contains no wheat products.
  • Low-Carb Modifications: Use unsweetened cocoa nibs for added crunch without carbs.

Frequently Asked Questions (FAQ)

  1. Can I make Chocolate Keto Fat Bombs ahead of time? Absolutely! They store well in the fridge or freezer, making them perfect for meal prep.
  2. What are the best substitutes for peanut butter? Almond butter, cashew butter, or sunflower seed butter work great!
  3. Can I cook this recipe in an air fryer? Since this recipe is no-bake, an air fryer isn’t necessary, but it’s great for other treats!

Conclusion

In summary, Chocolate Keto Fat Bombs are not just a delicious low-carb treat; they’re an enjoyable way to stay aligned with your keto lifestyle. The balance of creamy peanut butter and crunchy walnuts creates a delightful texture that’s hard to resist.

I encourage you to try this recipe and enjoy these guilt-free bites. Don’t forget to leave a comment with your experience, rate the recipe, or share it on social media! Happy snacking!

Keto Mini Pizzas

Easy Keto Mini Pizzas

Pizza is one of those classic comfort foods that everyone loves, but for those of us following a keto lifestyle, traditional pizza crusts are often a no-go. Thankfully, you can enjoy all the savory goodness of pizza without the carbs by making Easy Keto Mini Pizzas.

Easy Keto Mini Pizzas

These mini pizzas are perfect for a quick meal, snack, or a fun family dinner. They offer the satisfying pizza experience you crave while keeping your carb count low, making them a great option whether you’re on a keto diet, low-carb diet, or just looking for a healthier alternative.

In this article, we’ll walk you through everything you need to know about making easy keto mini pizzas that are not only delicious but also tailored to fit your lifestyle. From choosing the best crust to topping ideas and baking tips, we’ll cover all the essential aspects to help you create the perfect keto pizza every time.

Why Choose Easy Keto Mini Pizzas?

You may be wondering: why should I choose Easy Keto Mini Pizzas over a traditional pizza? Let’s explore the benefits.

A Perfect Low-Carb Alternative to Traditional Pizza

One of the key principles of the keto diet is reducing carbohydrate intake to enter and maintain a state of ketosis, where your body burns fat for energy. Traditional pizza crust is typically made from flour, which is high in carbs. This makes it unsuitable for those on a keto diet. Keto mini pizzas, on the other hand, are made with low-carb crust alternatives such as cauliflower, almond flour, or even cheese-based crusts. These ingredients are perfect for those looking to cut carbs without sacrificing taste.

Keto Mini Pizzas allow you to satisfy your pizza cravings while staying within your daily carb limits, making them an excellent option for maintaining ketosis.

Portion Control with Mini Pizzas

Another benefit of making mini pizzas is portion control. Since each pizza is individual-sized, you can easily control the amount you eat, which is great for staying on track with your nutrition goals. You can even customize each mini pizza to your personal taste, ensuring that everyone gets exactly what they want without any leftovers tempting you.

What Makes These Easy Keto Mini Pizzas So Delicious?

Now that you know why keto mini pizzas are a great choice, let’s dive into what makes them so tasty and satisfying.

The Keto-Friendly Crust

The crust is the foundation of any great pizza, and the good news is that there are plenty of keto-friendly options to choose from. Here are a few of the best crust alternatives that ensure your pizza is low-carb without compromising on taste:

  • Cheese-Based Crust: This is one of the most popular and easiest options for a keto pizza crust. You simply melt mozzarella cheese, mix it with an egg and some seasonings, and bake it to form a crust. The result is a crisp, cheesy crust that holds up well under your toppings.
  • Cauliflower Crust: If you prefer a vegetable-based crust, cauliflower is a fantastic low-carb alternative. Cauliflower crust is light and fluffy with a mild flavor, making it a great base for your favorite pizza toppings.
  • Almond Flour Crust: Almond flour is a great option for a more traditional-style crust that’s gluten-free and low-carb. It adds a slightly nutty flavor and a soft texture that works well with many toppings.

Delicious Toppings to Satisfy Your Pizza Cravings

The beauty of Easy Keto Mini Pizzas is the freedom to customize the toppings to your liking. The possibilities are endless, but here are some of the best toppings for a keto-friendly pizza:

  • Cheeses: Mozzarella is the classic pizza cheese, but you can also add parmesan, goat cheese, or cheddar for extra flavor and variety.
  • Meats: Pepperoni, sausage, bacon, chicken, and ground beef all work well on keto mini pizzas. These toppings add protein and healthy fats while keeping carbs low.
  • Veggies: Add a variety of veggies such as mushrooms, bell peppers, onions, spinach, and olives. These are not only low in carbs but also packed with vitamins and antioxidants.
Easy Keto Mini Pizzas

How to Make Easy Keto Mini Pizzas at Home

Making Easy Keto Mini Pizzas is simple and quick, especially when you follow these step-by-step instructions. Whether you’re a beginner or an experienced cook, you’ll find this recipe easy to follow and customizable to your tastes.

Step-by-Step Instructions for Making the Crust

  1. Cheese-Based Crust:
    • Preheat your oven to 400°F (200°C).
    • In a bowl, combine 1 ½ cups shredded mozzarella cheese, 1 beaten egg, 1 tablespoon almond flour, and ½ teaspoon of garlic powder.
    • Microwave the mixture for 30 seconds to soften the cheese, then mix until you get a dough-like consistency.
    • Roll the dough into a ball and then flatten it into a mini pizza shape on a parchment-lined baking sheet.
    • Bake the crust for 8-10 minutes, or until golden and crispy.
  2. Cauliflower Crust:
    • Preheat your oven to 400°F (200°C).
    • Steam or microwave 1 cup of cauliflower florets until tender, then pulse them in a food processor until fine.
    • Squeeze out excess moisture using a clean kitchen towel.
    • In a bowl, combine the cauliflower, 1 egg, ½ cup of shredded mozzarella cheese, and ¼ cup of almond flour. Add salt and pepper to taste.
    • Shape the mixture into small, individual pizza crusts on a baking sheet.
    • Bake for 15-20 minutes or until golden and crispy.
  3. Almond Flour Crust:
    • Preheat your oven to 375°F (190°C).
    • In a mixing bowl, combine 1 ½ cups almond flour, 1 egg, ½ teaspoon baking powder, 1 tablespoon olive oil, and a pinch of salt.
    • Form the dough into individual mini pizza crusts on a parchment-lined baking sheet.
    • Bake for 10-12 minutes, until the crusts are firm and lightly browned.

Assembling the Mini Pizzas

  1. Spread the Sauce:
    Once your crust is baked, spread a thin layer of keto-friendly pizza sauce or marinara sauce on top. Be sure to use a sugar-free version to keep the carbs low.
  2. Add Cheese and Toppings:
    Sprinkle a generous amount of shredded mozzarella cheese over the sauce. Then, add your preferred toppings, such as pepperoni, sausage, vegetables, or a combination of all three.
  3. Bake and Enjoy:
    Place the mini pizzas back in the oven and bake for 5-7 minutes, or until the cheese is melted and bubbly. If you like your crust extra crispy, broil the mini pizzas for an additional 2 minutes.

Tips for Perfecting Your Easy Keto Mini Pizzas

To ensure your Easy Keto Mini Pizzas come out perfectly every time, here are some helpful tips:

  • Crisp the Crust: Pre-bake your crust before adding toppings to ensure it stays crispy and doesn’t become soggy.
  • Don’t Overload with Sauce: Using too much sauce can make the crust soggy. Keep it light, and use a thicker sauce if possible.
  • Use High-Quality Cheese: Freshly shredded mozzarella cheese will give you the best texture and flavor. Avoid pre-shredded cheese, as it often contains anti-caking agents that can affect the melt.

Keto Mini Pizza Recipe

Here’s a simple recipe for making the Easy Keto Mini Pizzas:

Easy Keto Mini Pizzas

Keto Mini Pizzas

Alice
Craving pizza while staying on track with your keto diet? These Keto Mini Pizzas are the perfect solution! Low-carb, gluten-free, and packed with delicious toppings, these mini pizzas are ideal for anyone following a keto lifestyle. Enjoy a crispy crust made from cheese or almond flour, topped with your favorite keto-friendly ingredients. Whether you’re looking for a quick snack or a meal, these mini pizzas will satisfy your cravings without compromising your diet.
Prep Time 10 minutes
Cook Time 15 minutes
Total Time 15 minutes
Cuisine Keto
Servings 4 mini pizzas
Calories 250 kcal

Ingredients
  

  • 1 ½ cups mozzarella cheese shredded
  • 1 egg beaten
  • 1 tablespoon almond flour optional for added texture
  • ½ teaspoon garlic powder
  • 2 tablespoons marinara sauce sugar-free
  • 1 cup additional shredded mozzarella cheese for topping
  • Optional toppings: pepperoni bell peppers, olives, mushrooms, onions, cooked chicken, or bacon

Instructions
 

  • Preheat your oven to 400°F (200°C). Line a baking sheet with parchment paper.

Prepare the crust:

  • In a microwave-safe bowl, combine 1 ½ cups shredded mozzarella cheese, 1 beaten egg, 1 tablespoon almond flour, and ½ teaspoon garlic powder. Microwave the mixture for 30 seconds to soften the cheese, then mix well until you get a dough-like consistency.

Shape the dough:

  • Roll the dough into a ball and then flatten it into individual mini pizza crusts, about 4-6 inches in diameter, on the prepared baking sheet.

Bake the crust:

  • Place the mini crusts in the oven and bake for 8-10 minutes, or until golden and crispy.

Add the toppings:

  • Once the crusts are baked, spread 1-2 tablespoons of sugar-free marinara sauce on each crust. Then, sprinkle 1 cup of shredded mozzarella cheese evenly across the pizzas. Add any additional toppings, such as pepperoni, veggies, or cooked chicken.

Final bake:

  • Place the mini pizzas back into the oven for 5-7 minutes, or until the cheese is melted and bubbly. If you like your crust extra crispy, broil for an additional 2 minutes.

Serve and enjoy:

  • Remove the mini pizzas from the oven and allow them to cool for a few minutes before serving. Enjoy!

Notes

  • If you’re using almond flour for the crust, it will add a slightly nutty flavor and improve the texture.
  • Feel free to get creative with your toppings! You can add any of your favorite keto-friendly ingredients, from veggies to meats.
  • Make sure to use a sugar-free marinara sauce to keep the carb count low.

Frequently Asked Questions (FAQ)

Q1: Can I make the crust ahead of time?
Yes! You can prepare the crust ahead of time and store it in the fridge for up to 2 days or freeze it for longer storage. Just bake the crust and add toppings when you’re ready.

Q2: Are keto mini pizzas good for meal prep?
Absolutely! These mini pizzas are perfect for meal prepping. You can make several at once and store them in the fridge or freezer for an easy meal during the week.

Q3: Can I use regular pizza sauce?
Regular pizza sauce typically contains added sugar, which makes it higher in carbs. Stick to a sugar-free marinara sauce or make your own using fresh tomatoes, olive oil, and herbs.

Q4: Can I use non-dairy cheese?
Yes, you can use dairy-free cheese alternatives such as almond milk cheese or coconut-based cheese to make the pizza vegan-friendly and dairy-free.

Conclusion: Enjoy Your Easy Keto Mini Pizzas Today!

Making Easy Keto Mini Pizzas at home is simple, fun, and satisfying. With a variety of keto-friendly crusts and toppings to choose from, you can create the perfect pizza every time. These mini pizzas offer a great way to enjoy pizza without the carbs, making them an ideal meal for anyone following a keto or low-carb diet.

Call-to-Action:
Ready to make your own keto mini pizzas? Try out the recipe and customize the toppings to suit your tastes. Don’t forget to share your creations with friends and family and inspire them to join you in enjoying these guilt-free, delicious pizzas!